Azure DevOps (ADO) provides out-of-the-box notifications for various events. These notifications are useful if you need to be notified of various Code Builds, Release Pipeline events, or simply Work Item Notifications.
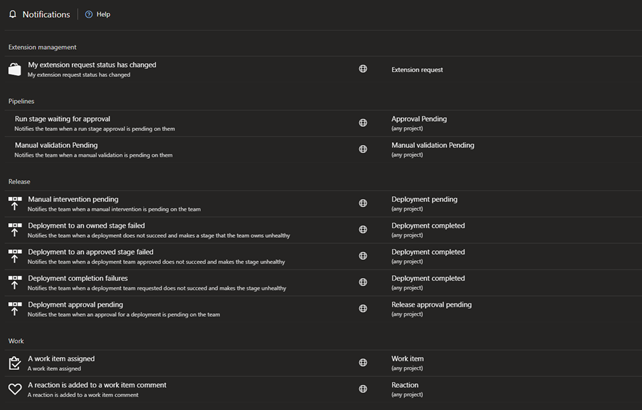
One issue with the notifications is the inability to segregate notifications by project in MS Outlook. The sender and subject lines do not provide enough unique information to generate Outlook rules for these Azure DevOps notifications to separate them into folders.

How can we fix this?
We can look towards the message internet headers to solve this.
Creating Outlook Rules in the Desktop Client
In MS Outlook, navigate to an Azure DevOps notification for a project. Double click on the message to open the message in a new pane and navigate to File > Properties.
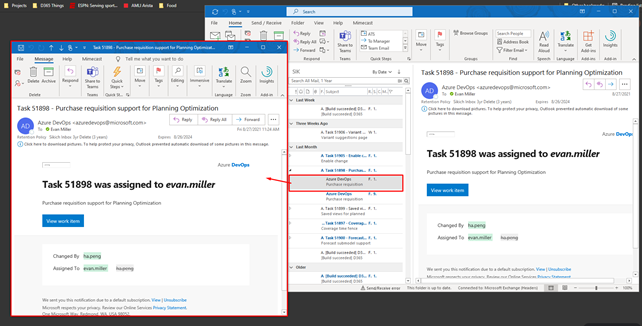
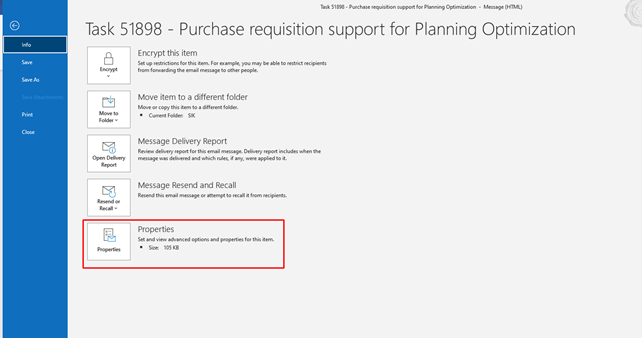
This will open the Properties menu. We want to review the Internet headers. I highly recommend copying the entire Internet headers section into a Notepad or a Word document to search against.
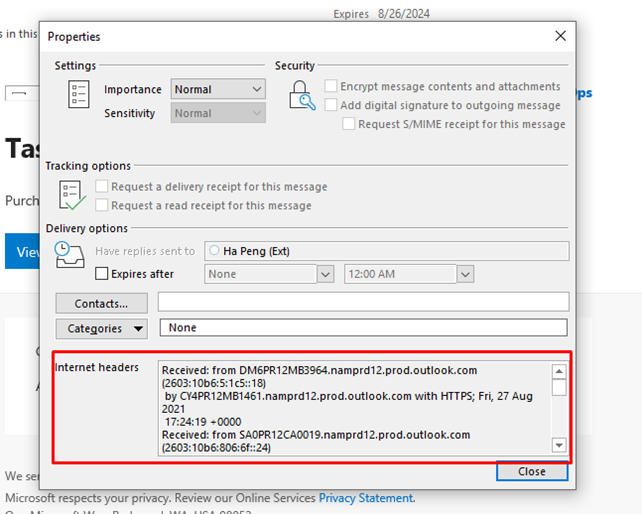
Once copied or if reviewing in the properties section, locate the string that begins with:
X-VSS-Scope
This will denote what organization and project the message is referencing. For the example above, mine appears as:
X-VSS-Scope: Sikich-AX/Enterprise Solutions
We can use this string to generate our Outlook rule.
Navigate back to Outlook. To begin creating a rule using advanced options, click on Home > Move section > Rules > Create Rule.
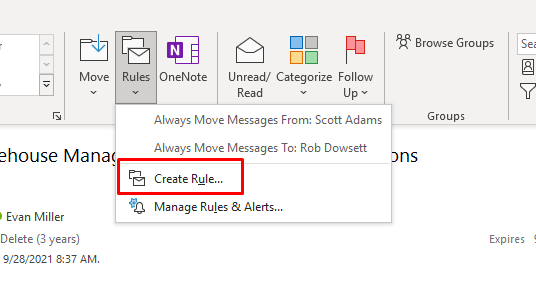
In the Create Rule, click on the Advanced Options button to bring up the Rules Wizard form.
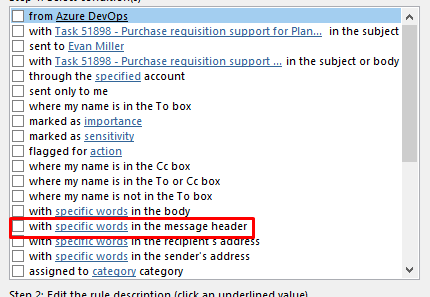
In Rules Wizard form, select the following condition in Step 1:
With specific words in the message header
Once selected, we will see the rule at the bottom of the screen in Step 2. Click on “specific words” link. Enter in the X-VSS-Scope string found earlier. From here, we can click Add to enter the string into the Search list box. Click OK.
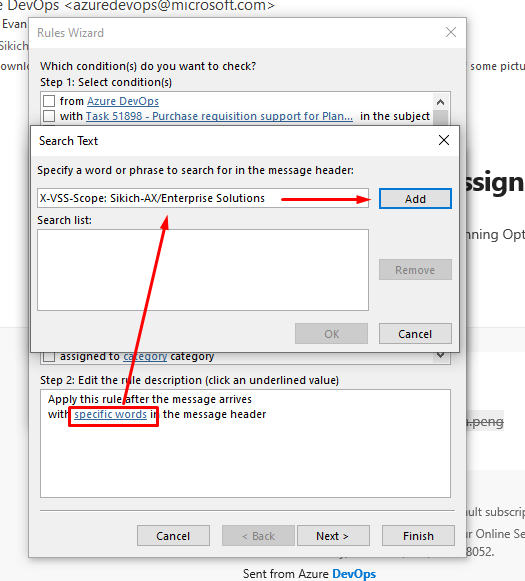
Back in the Rules Wizard form, the string should be copied into Step 2. Click Next and determine what you want to do with the messages (i.e., move to specific folders, delete it, automatically reply to it, etc.). Click Next and determine if there are any exceptions to add. Click Next and enter a name for the rule and determine whether to run the rule now and to turn on the rule. Once completed, click Finish button, and the rule will begin to run if you select to run the rule now.
Creating Outlook Rules in the Web Client
Navigate to Outlook.com and login. Find an Azure DevOps message for the project you would like to create a rule for and click on the three dots at the top right of the message.
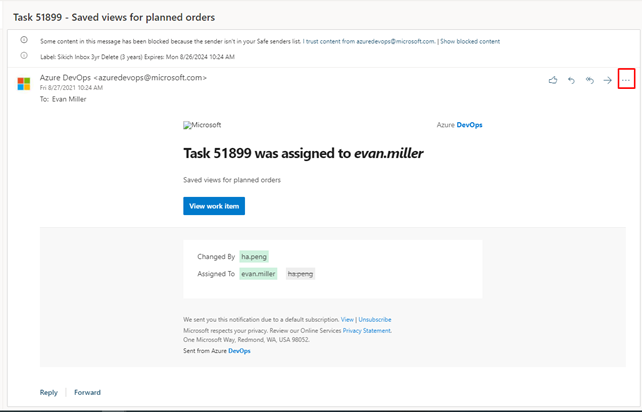
Navigate to View > View Message details. This will bring up the same message details as in the desktop client. Either copy the message out or review the message for string:
X-VSS-Scope
Copy the full string with the organization and project. Again, mine appears as:
X-VSS-Scope: Sikich-AX/Enterprise Solutions
Close the Message details.
Creating the rule is a bit different in Outlook online.
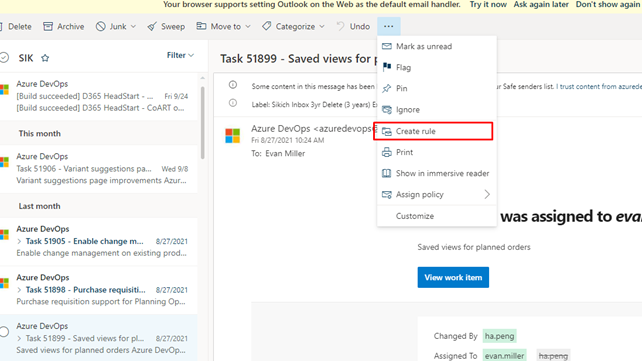
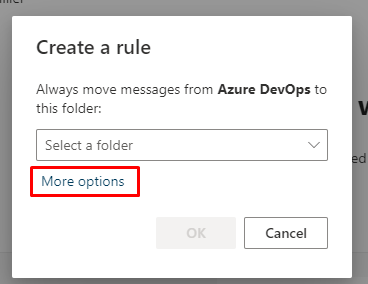
Click on the three dots at the top of Outlook and click on Create Rule. Click “more options” link in the Create a rule popup.
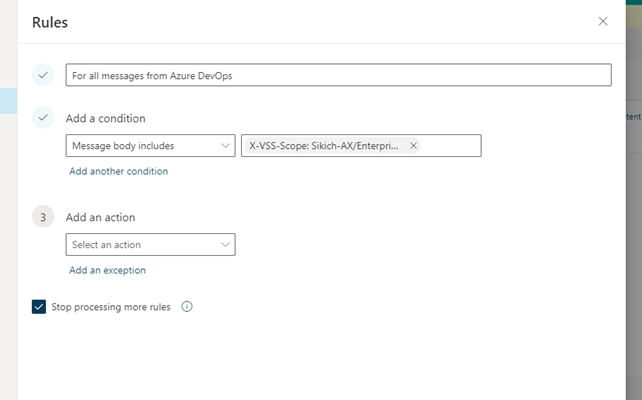
On the Rules screen, setup the rule.
- Enter the name of the rule
- Condition of rule.
- Set to “Message body includes”
- Paste the X-VSS Scope string in the second box
- Determine what action should take place
- Determine what exceptions should take place
- Determine whether to run rule now
- Once the rule is filled out, click Save.
- If you’ve selected to run rule now, it will process after saving
Hopefully, setting up these rules will help you to organize notifications emails sent from various Azure DevOps projects in a more manageable way with MS Outlook.


