A pretty common scenario in most implementations is the need to import data. In this example with Dynamics 365, we will look specifically at general ledger journal data, as almost every project imports some form of General Ledger history.
There are a few ways to go about this. The Excel add in is a great tool for small volumes of data, but won’t handle large volumes well (1000+ lines).
For large imports, the Data Management Framework (DMF) is an excellent choice. This provides a tool that can handle very large files, large volumes of files, and automated processing.
We will be using the Ledger Journal Entity (LedgerJournalEntity), and to keep this scenario real world, we will also add a custom field to the ledger journal lines table to reference a legacy account code.
Adding a Custom Field
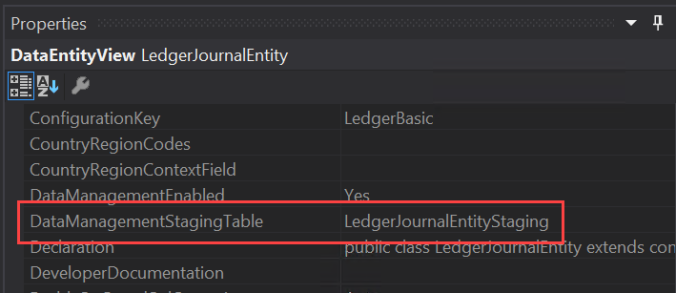
We need to populate a new field on the journal line with a legacy account code. To do this we first need to identify the objects we need to modify. LedgerJournalTrans is the easy one. We know we are using the General journal entity. By looking at the properties of the entity in Visual Studio, we can see the staging table used by the entity is called LedgerJournalEntityStaging. We will also need to add our custom field to this table and extend the entity to expose the new field.
And lastly, we will need to populate our new field when the journal is created. Our new field will be populated in the staging table by the mapping on the DMF project. Our new field on the journal line (LedgerJournalTrans) will need to be populated explicitly by us. To determine how to do this, look at the method copyCustomToStaging on the LedgerJournalEntity object. You can see the data is inserted into the LedgerJournalTrans table via a insert_recordset operation. In fact, all operations are recordset based, to improve performance.

We don’t want to customize any objects, so what do we do? We can create an event handler for the post event of this method, and in our own recordset operation, populate our new field.

Create a new class, paste in the method header, and write your update command. Note the skipDataMethods call – without this the update operation will revert to record by record updates. For a 10,000 line file, that’s about two hours vs two minutes.
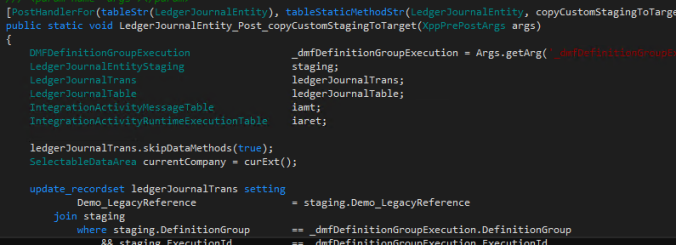
Full method:
[PostHandlerFor(tableStr(LedgerJournalEntity), tableStaticMethodStr(LedgerJournalEntity, copyCustomStagingToTarget))] public static void LedgerJournalEntity_Post_copyCustomStagingToTarget(XppPrePostArgs args)
{ DMFDefinitionGroupExecution _dmfDefinitionGroupExecution = args.getArg('_dmfDefinitionGroupExecution'); LedgerJournalEntityStaging staging; LedgerJournalTrans ledgerJournalTrans; LedgerJournalTable ledgerJournalTable;
ledgerJournalTrans.skipDataMethods(true); SelectableDataArea currentCompany = curExt();
update_recordset ledgerJournalTrans setting Demo_LegacyReference = staging.Demo_LegacyReference join staging where staging.DefinitionGroup == _dmfDefinitionGroupExecution.DefinitionGroup && staging.ExecutionId == _dmfDefinitionGroupExecution.ExecutionId && staging.TransferStatus == DMFTransferStatus::Completed && staging.JournalBatchNumber == ledgerJournalTrans.JournalNum && staging.LineNumber == ledgerJournalTrans.LineNum; }
Define Data Import Format
We only need a handful of values to create a journal. Obviously debit or credit, currency code, transaction date, account string. We know we also have our new field. We can also have a field for our journal batch number.
So our format (CSV) will look like this – Batch, Date, Account, Legacy account, Currency, Debit, Credit.
We will also need to format the values in our file correctly – specifically dates and numbers.
Financial Dimension Configuration for Integrating Applications
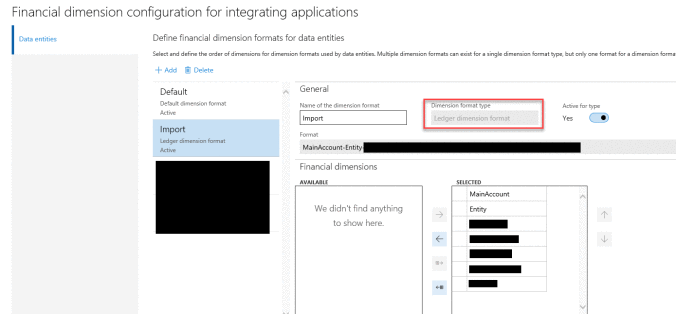
As important as the format of our source file is the format of our account string (GL account + dimensions). This is setup under General ledger Chart of accounts Dimensions Financial dimension configuration for integrating applications.
A few things to remember before you begin – Make sure the dimension format type is “Ledger dimension format.” Include all your dimensions – you can only have one format, but you can leave unused dimensions blank in the account string.
Create DMF Project
In D365, we need to create a new DMF project to import our data. Do this from the Data Management workspace, click on “Import.”
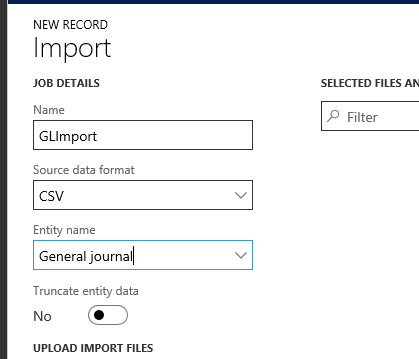
Upload a sample source file which will generate mapping.
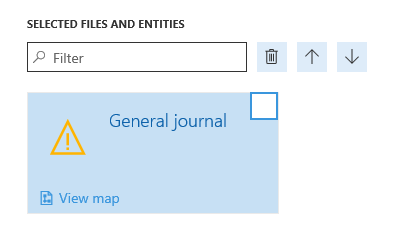
Click on “View map” and switch to the Mapping details tab (I prefer this over the visual mapping tool).
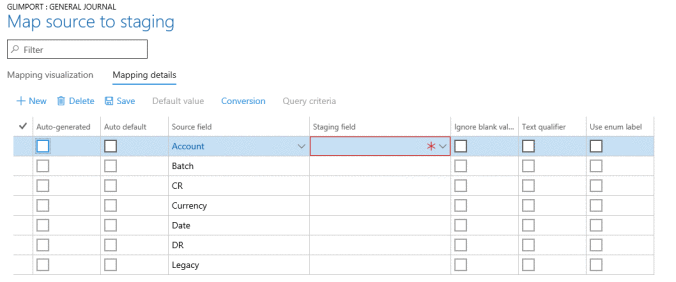
And complete the mapping setup.
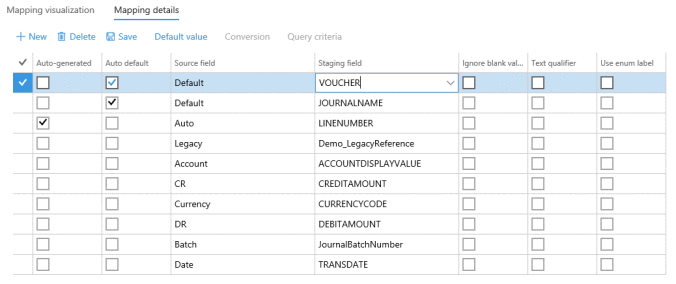
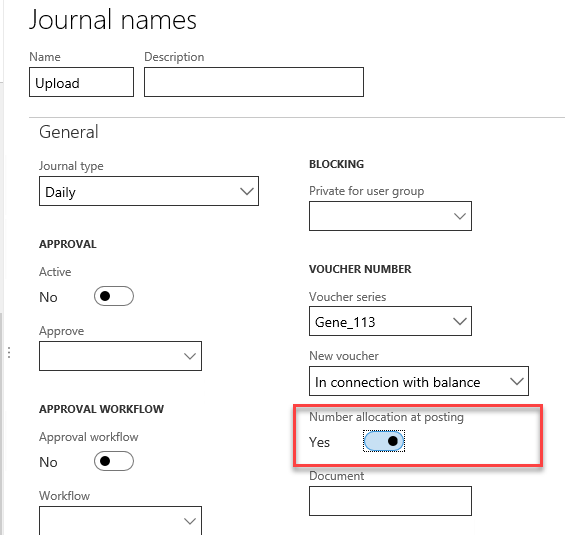
Note the three additional lines for voucher, journal name & line number. Line number is auto generated, journal name is defaulted to a value of our choosing via the default value button (Upload in my case) and voucher is auto defaulted also (I used VN1). Voucher will be replaced with a real voucher number when the journal is posted, based on the “Number allocation at posting” setting on the journal name setup.
Create the Recurring Data Job
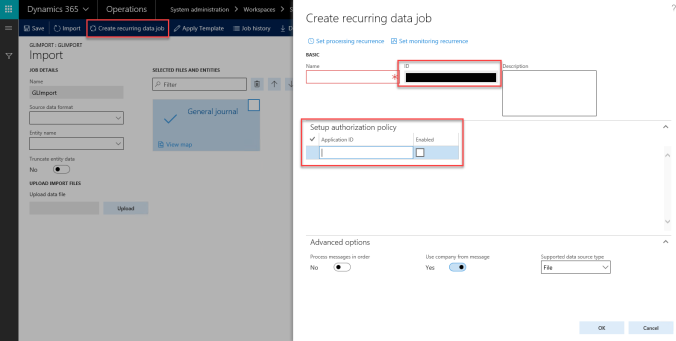
Next we create the recurring data job. This will create a endpoint we can enqueue our files to as well as the batch job to process the inbound message.
Note the ID – this will form part of our URL later when we build our logic app.
The Application ID needs to come from your Azure AAD Application.
Set both the processing and monitoring recurrence as necessary.
Azure Active Directory Applications
This will associate our integration with a user account in D365.

Logic App
I’m not going to cover the entire Logic App creation, as Microsoft are soon to publish an ARM Template for this. Below is the basic flow of two Logic Apps. This is pretty simple. You could do a lot more here in terms of error handling if you were so inclined.
Logic App #1 (Get-files)
- Runs on a predefined schedule
- This looks for files in the source folder
- For each file in source, copy itto an In-Process folder and send the file name to Logic App #2
- Logic App #2
- receives the file path from #1
- gets the content of the file using the OneDrive action
- Extracts the company code from the file name
- Enqueues the file to D365
- Return response code from D365 to #1
- (You could do more here based on the response code…)
- Based on the response code, move the file to an error or archive folder
- Delete the original file from in-process
- Logic App #2
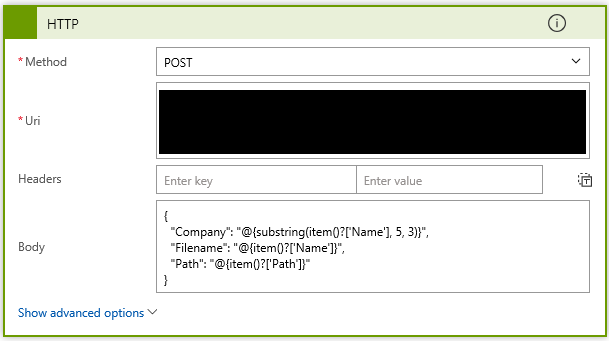
Below is the HTTP POST action in Logic App #1, which passes the Company, file name & file path to Logic App #2. Note the ability to use expressions in the input of the action. Take a look at the Workflow Definition Language schema for Azure Logic Apps for more detail.
LogicApp #2 (Enqueue files)
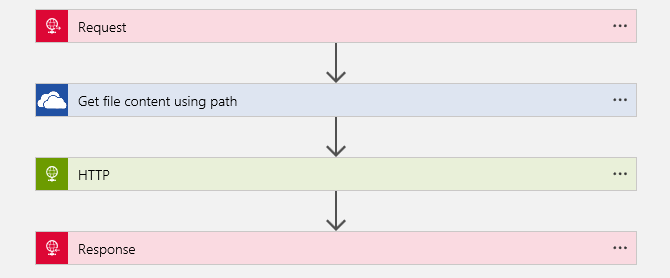
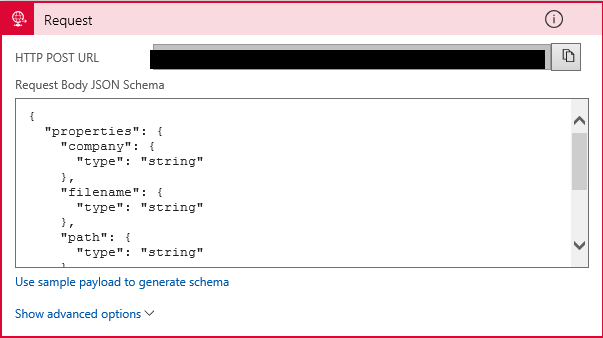
The first action is the HTTP Request. Use the HTTP POST URL to call this Logic App from the first Logic App. The parameters we need to receive are defined in the Request Body JSON Schema.
Next, using the Path parameter and the “Get file content using path” OneDrive for Business action, we get the contents of our source file.

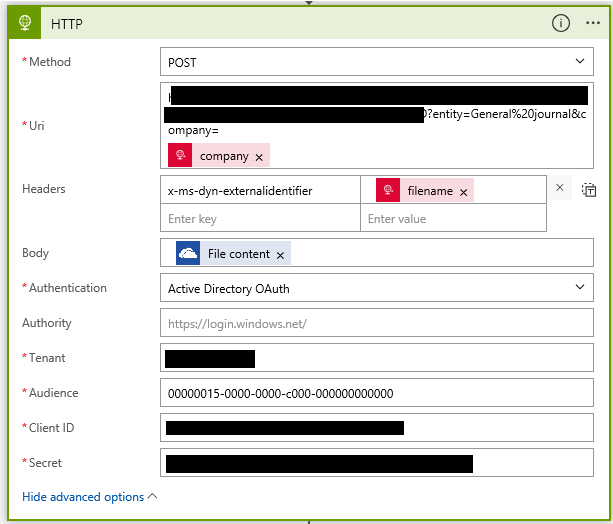
Now we have the file contents, we can send it to D365. I’m using the HTTP POST action.
The URI is made up of a number of different pieces of information
- the base D365 URL (https://demo.sandbox.operations.dynamics.com) +
- The recurring integration ID obtained earlier from D365 (/api/connector/enqueue/%7BRECURRINGINTEGRATIONID%7D) +
- The entity we are importing (?entity=General%20journal) +
- The company we are importing into (?company=DAT)
So the full URI would look something like the following:
Note %7b & %7d before and after the recurring integration ID are the URL escape characters for { & }.
Also note I am using the company parameter on the end of the URI to specify the import company, not hard coding it.
To make life a bit easier we can also pass the file name to D365 using the header x-ms-dyn-externalidentifier key with the value to be our file name.
We set the body of our request to be the source file contents.
For authentication we use Active Directory OAuth. Tenant is your o365 tenant domain.
Audience was a little tricky to find, but I believe it is constant for D365 for Operations. Here is where that value came from.
Client ID and Secret come from your AAD application.
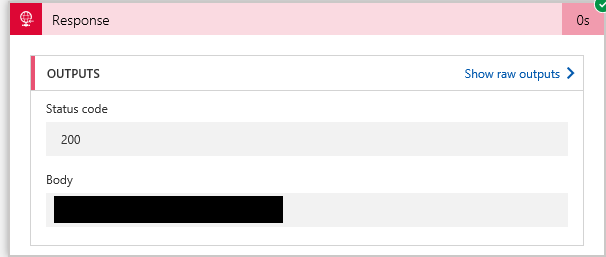
Our response takes the status code received from D365 and the Body (hopefully the message ID otherwise an error message) and returns those to our first Logic App.

The End Result
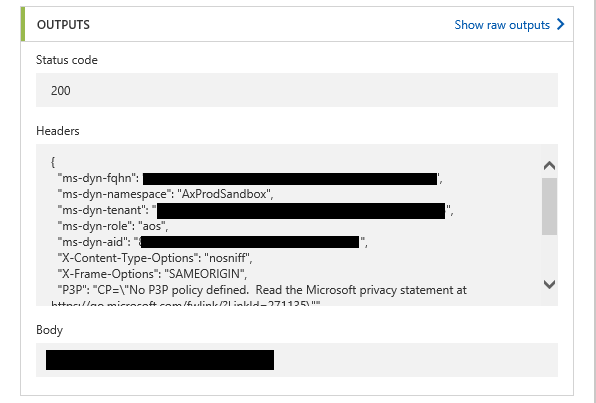
Response from HTTP POST action to D365:
Response sent back to Logic App #1:
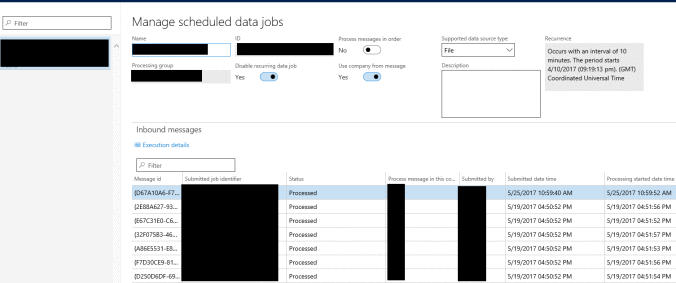
And in D365 schedule data jobs, we can see out messages being processed successfully.
Have any questions about how to import the General Ledger Journal data in Dynamics 365? Please contact one of our D365 experts at any time!
This publication contains general information only and Sikich is not, by means of this publication, rendering accounting, business, financial, investment, legal, tax, or any other professional advice or services. This publication is not a substitute for such professional advice or services, nor should you use it as a basis for any decision, action or omission that may affect you or your business. Before making any decision, taking any action or omitting an action that may affect you or your business, you should consult a qualified professional advisor. In addition, this publication may contain certain content generated by an artificial intelligence (AI) language model. You acknowledge that Sikich shall not be responsible for any loss sustained by you or any person who relies on this publication.


