A common practice for Microsoft 365 Defender is to implement an anti-phishing policy. These policies protect email accounts from being spoofed. You can read more about the specifics here: https://learn.microsoft.com/en-us/microsoft-365/security/office-365-security/anti-phishing-policies-about?view=o365-worldwide
A benefit to implementing anti-phishing policies is that you can turn on user impersonation. User impersonation is the combination of the user’s display name and email address. For example, John Doe (John.Doe@example.com) might be impersonated as John Doe, but with a completely different email address, like: John Doe (John.Doe@example-mail.com). The email will be labeled with Protection Policy Category UIMP (user impersonation).
One limitation to these policies is that from the Security admin center you can only add users one at a time to the impersonation section.
The solution to this problem is PowerShell of course. In this blog I’ll walk through the steps to bulk add users to your anti-phishing policies impersonation section.
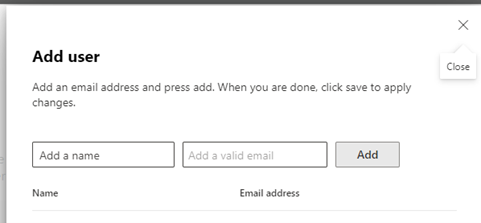
Step 1 – Export a list of mailboxes from the Exchange Online Admin Center
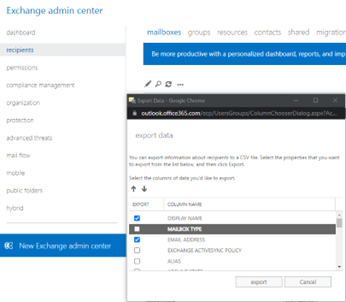
Exchange Admin Center > Classic Exchange admin center > Mailboxes > … > export data to a CSV file > check the boxes for “Display Name” and “Email Address”
Step 2 – Merge Columns
Download the free version of Ron’s Editor: https://www.ronsplace.ca/products/ronseditor
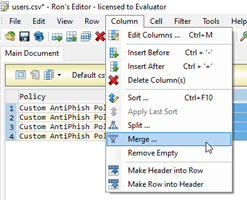
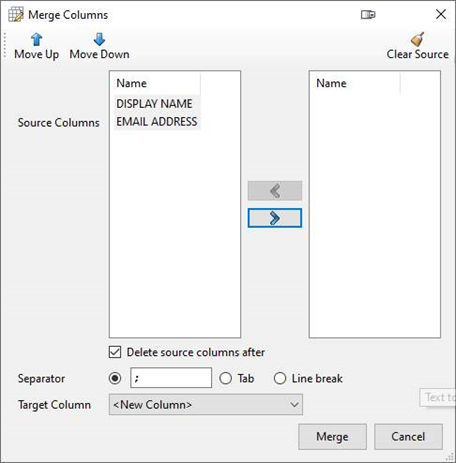
Using Ron’s Editor, merge the two columns into one, with a semi-colon separating the two fields of data.
Step 3 – Copy the Data to a New Excel Sheet
Select all the data and copy it to a new Excel sheet. I’ve saved the file in C:tempusers.csv. A maximum of 350 users can be included in the impersonation section of a single anti-phishing policy. If you have more than 350 users, you’ll need to create multiple anti-phishing policies and create multiple users.csv files.
Here’s an example where we have four custom anti-phishing policies:
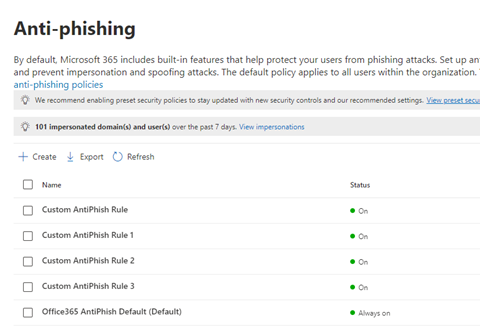
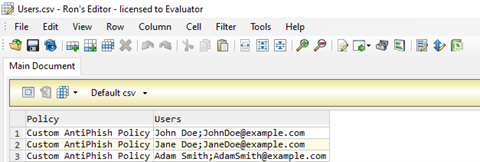
Your new Excel document should look like this:

If you open the CSV with Notepad it be formatted like example the below:
Policy,Users
Custom AntiPhish Policy,John Doe;JohnDoe@example.com
Custom AntiPhish Policy,Jane Doe;JaneDoe@example.com
Custom AntiPhish Policy,Adam Smith;AdamSmith@example.com

Step 4 – Import with PowerShell
Get the name of the Anti-phishing policies. The name in the M365 Security Admin center may not match what’s on the back end. This is also useful if you’ve had to create multiple policies because you have more than 350 users.
Connect-ExchangeOnlineGet-AntiPhishPolicy
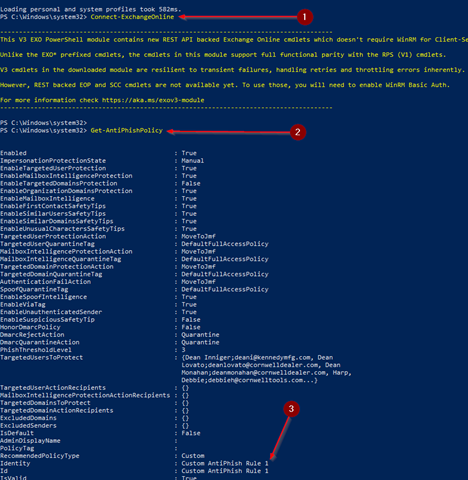
Update your CSV with the name of the policy if needed.
Run this from Exchange PowerShell:
$Users = Import-CSV -Path 'C:tempusers.csv'
ForEach ($User in $Users){
Set-AntiPhishPolicy -Identity $User.Policy -TargetedUsersToProtect @{add=$User.Users}
 Write-Host -ForegroundColor Green $user.Users "is added!"
}
Repeat these steps for each users.csv file you’ve created. The CSV file will need updated with the name of each anti-phish policy if multiple policies are required due to the 350-user limit per policy.
Step 5 – Check Your Work
From the M365 Security Admin Center, confirm that the users have been added to the impersonation section of your anti-phishing policy.
Conclusion
Hopefully this guide will save you some time and effort if you find yourself configuring impersonation for anti-phishing policies. I recently had to add ~1300 email addresses, and this method made it a breeze.
Have any questions about Microsoft 365 in general? Please contact us at any time!
This publication contains general information only and Sikich is not, by means of this publication, rendering accounting, business, financial, investment, legal, tax, or any other professional advice or services. This publication is not a substitute for such professional advice or services, nor should you use it as a basis for any decision, action or omission that may affect you or your business. Before making any decision, taking any action or omitting an action that may affect you or your business, you should consult a qualified professional advisor. In addition, this publication may contain certain content generated by an artificial intelligence (AI) language model. You acknowledge that Sikich shall not be responsible for any loss sustained by you or any person who relies on this publication.


