This website uses cookies so that we can provide you with the best user experience possible. Cookie information is stored in your browser and performs functions such as recognising you when you return to our website and helping our team to understand which sections of the website you find most interesting and useful.
Custom Segments and Leveraging Custom Record Functionality

NetSuite’s Custom Segment feature was discussed in an earlier blog here. This is an introduction to the Custom Record aspect of Custom Segments. Creating a Custom Segment also creates a Custom Record Type, which can then be edited to track additional information related to the Trade Show. Fields in the Custom Record can also be added to NetSuite Forms.
Use Case:
- Fictional Company is Valley Dental Supply.
- Valley sells dental supplies: chairs, X-ray machines, clinical instruments, surgical clothing and Lab Services.
- Their primary revenue stream is Trade Shows.
- Valley Dental is using Custom Segment to track Gross Profit per Trade Show. A Custom Segment called “Show Code” has been created and was added to Sales and Expense Transactions.
- Valley Dental is also tracking information specific to the Event in a Custom Record Called “Trade Show Information.”
- In addition to the show code, Valley Dental wants to track Sales Reps, Sponsor, and Projected Revenue per Trade Show. With the ultimate goal of reporting on Actual vs. Projected Revenue per Show.
Assumption:
- Custom Segment “Show Code” has already been applied to Sales Transactions
We are working with a Custom Segment called Show Code with four Values as illustrated below.
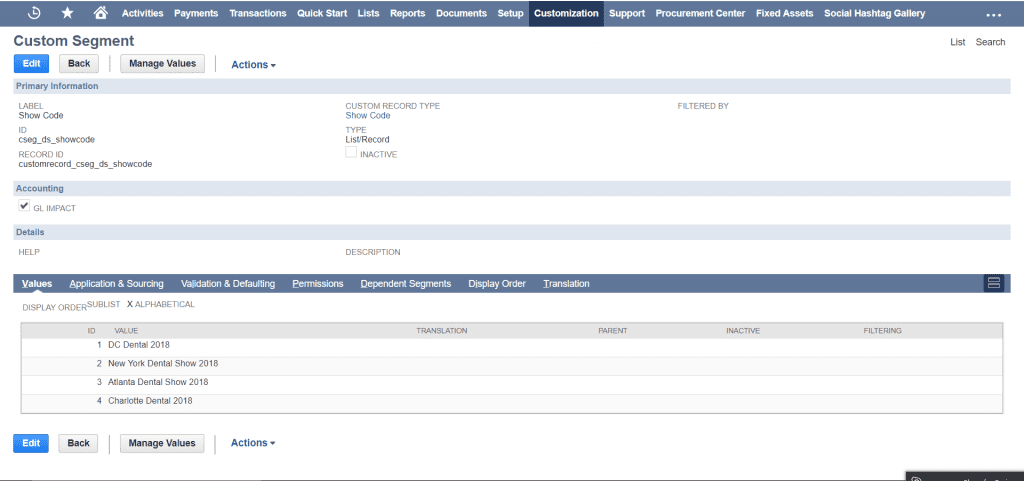
Edit Custom Record
Custom Segments also exist as Custom Records. Add fields to the Custom Record to track additional Information related to each Show Code. For this example we will add a Field called “Projected Revenue.”
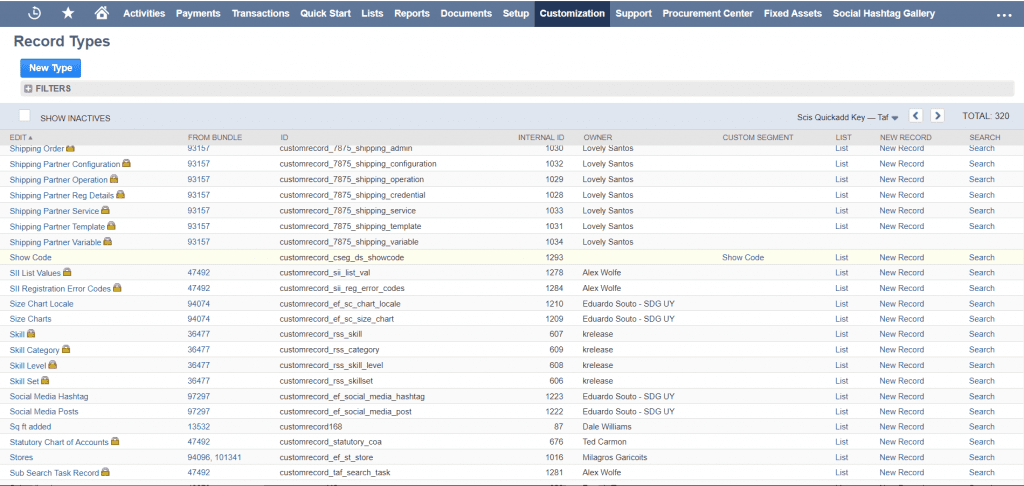
Navigate to Customization > List, Records, & Fields > Record Types
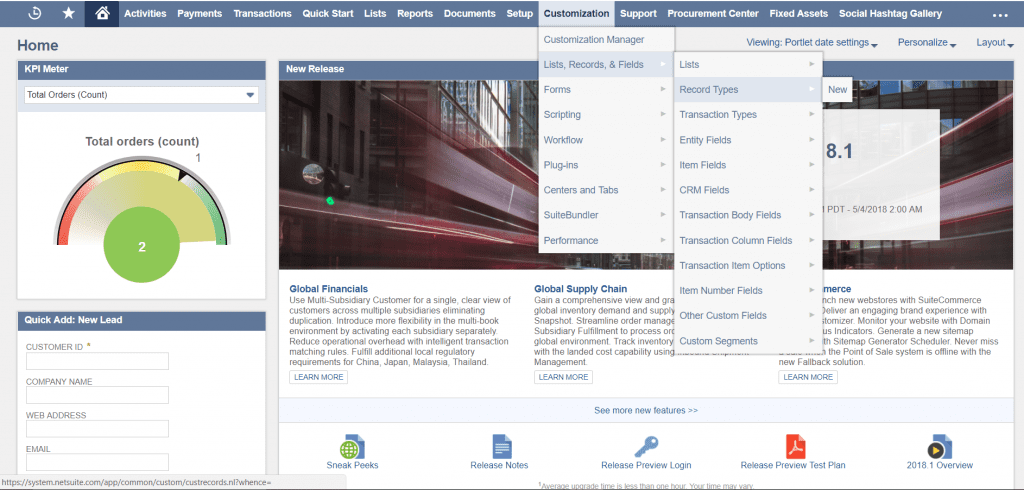
Note Show Code is in the List as a Custom Record. Select the Show Code Custom Record by clicking on the link.
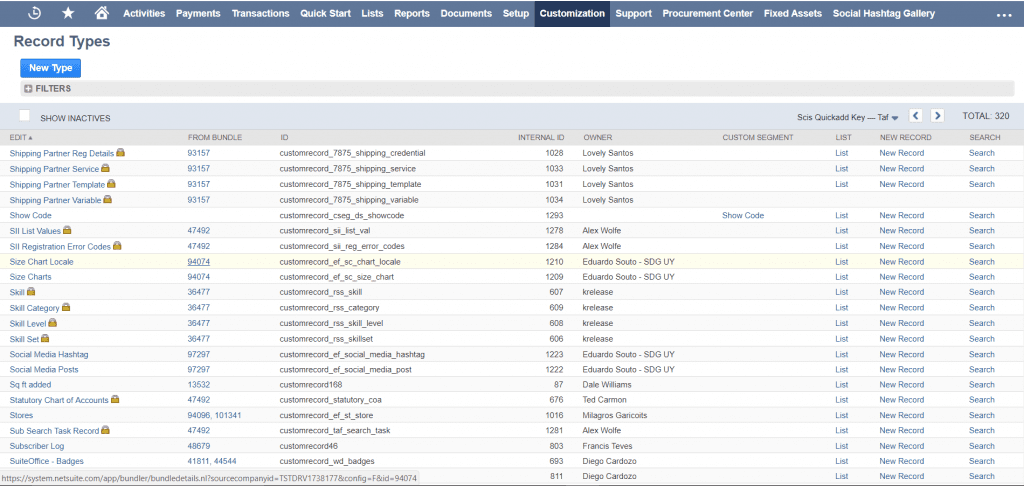
Once selected, the Page below appears. We are working under the Fields Subtab. Click the New Field Button:
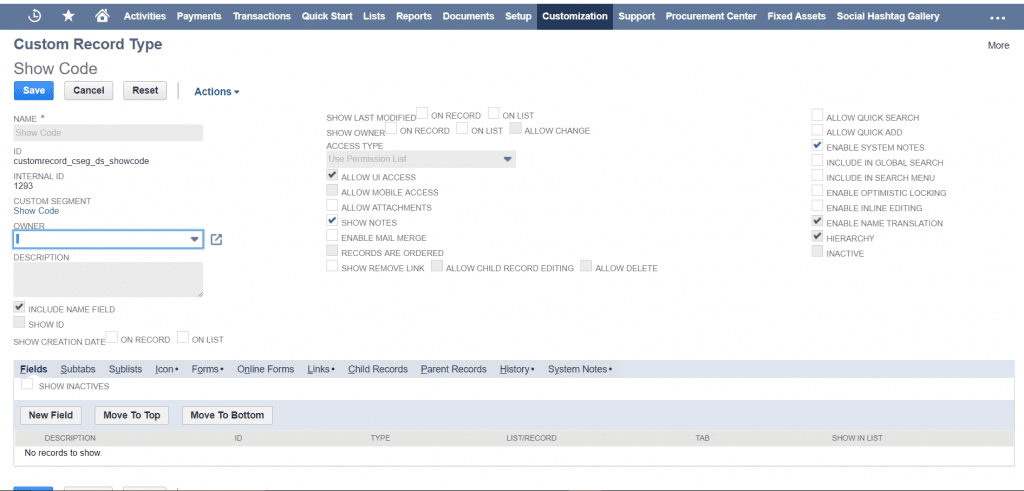
Note that NetSuite automatically checks and disables“Include Name Field,” which is normal.
New Field Page:
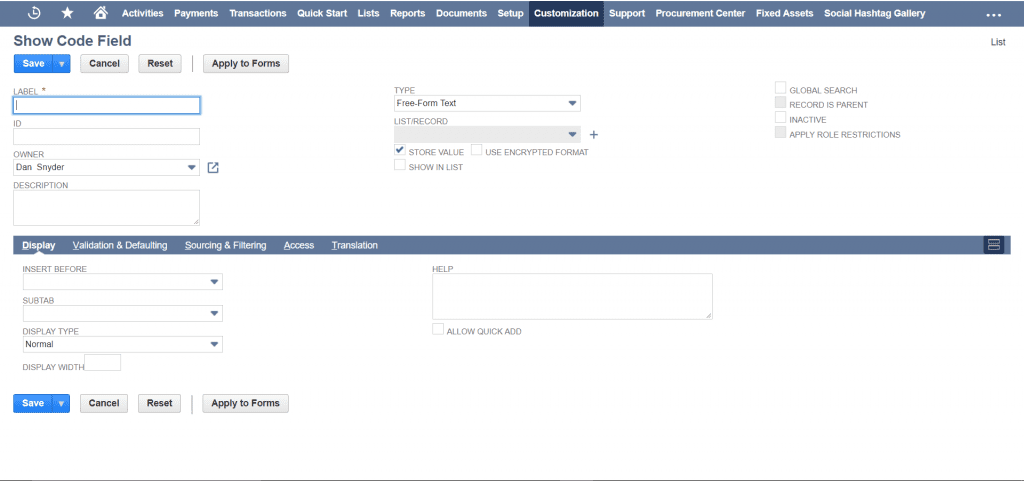
On this page:
- Name the Field Projected Revenue
- Type = Currency
- Store Value is checked
- Display Tab
- In the Help field add text for field-level Help.
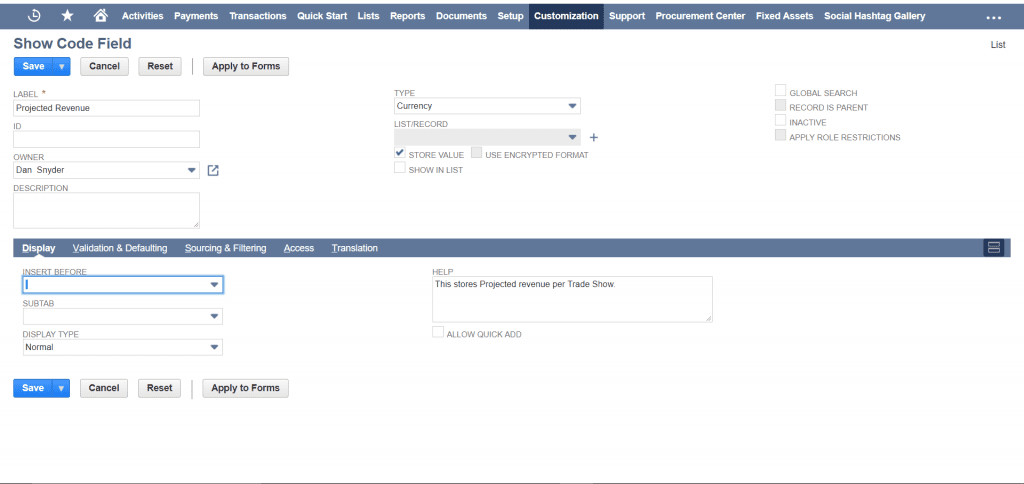
Then Click Save.
Next, add a Show Code to the Custom Record with Projected Revenue.
Navigate to Customization > List, Records, & Fields > Record Types. Find Show Code and click the New Record Link.
In the Name field enter the Show Code. This is automatically available due to “Include Name Field” being checked in the Custom Record setup above. In this example we are setting up a record for the 2018 Miami Dental Show with projected Revenue of $75,000. Complete any other new field. Click Save.
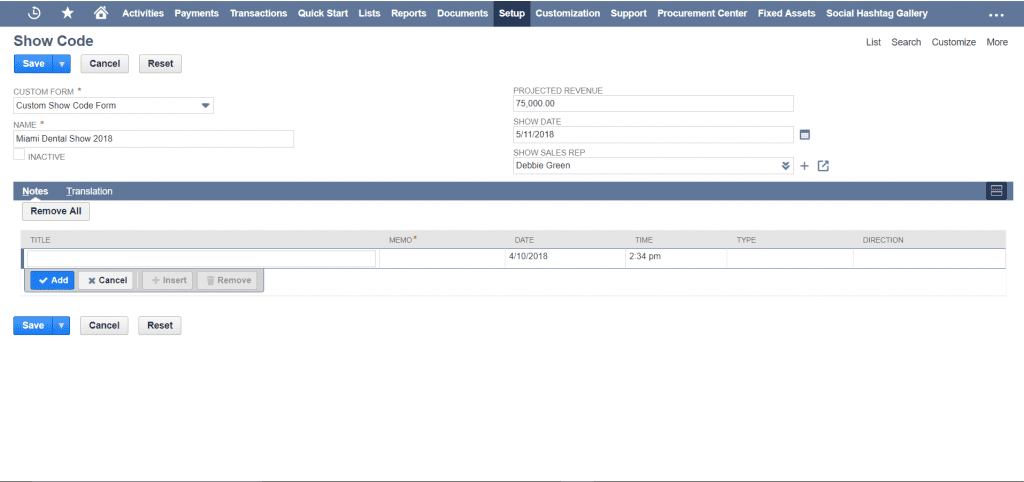
This gives us a Projected Revenue number to use in Reporting. Since we’re adding Show Code to Sales Invoices, Actual Revenue per Show is already available. You can build a Saved Searchto provide total Actual Revenue per Show compared against Projected Revenue.
Leveraging Custom Record functionality by using custom segments is just one of the great tools NetSuite has to offer. If you would like more information about NetSuite, please contact us at any time! You can also learn about more great tips for NetSuite on our YouTube playlist or our other blog posts.
This publication contains general information only and Sikich is not, by means of this publication, rendering accounting, business, financial, investment, legal, tax, or any other professional advice or services. This publication is not a substitute for such professional advice or services, nor should you use it as a basis for any decision, action or omission that may affect you or your business. Before making any decision, taking any action or omitting an action that may affect you or your business, you should consult a qualified professional advisor. In addition, this publication may contain certain content generated by an artificial intelligence (AI) language model. You acknowledge that Sikich shall not be responsible for any loss sustained by you or any person who relies on this publication.


