A common request from clients who utilize shared mailboxes for communication between their customers is to configure automated responses. Most people are aware of how to set up an out-of-office reply in Outlook for their personal mailbox. However, for a shared mailbox, this process is not as straightforward. Additionally, the message usually needs to be sent to every message sent to the mailbox. The standard behavior for automated replies is that they are sent only once to each unique recipient. For something like a customer service mailbox, it is best always to send a reply to ensure the necessary communication is seen.
While there are multiple ways to accomplish this request, the best method I have found is doing so via the use of Microsoft Power Automate, previously known as Microsoft Flow. This free service for Office 365 users is a powerful automation tool that was designed to increase productivity via the use of workflows.
While much can be written about this service and its capabilities, I am going to focus this post on how to accomplish this one specific task.
How to Set Up Automatic Replies From Shared Mailboxes:
- From the Office 365 Admin Center go to Users > Active Users and find the account tied to the shared mailbox and assign the necessary Microsoft Power Automate Free license.
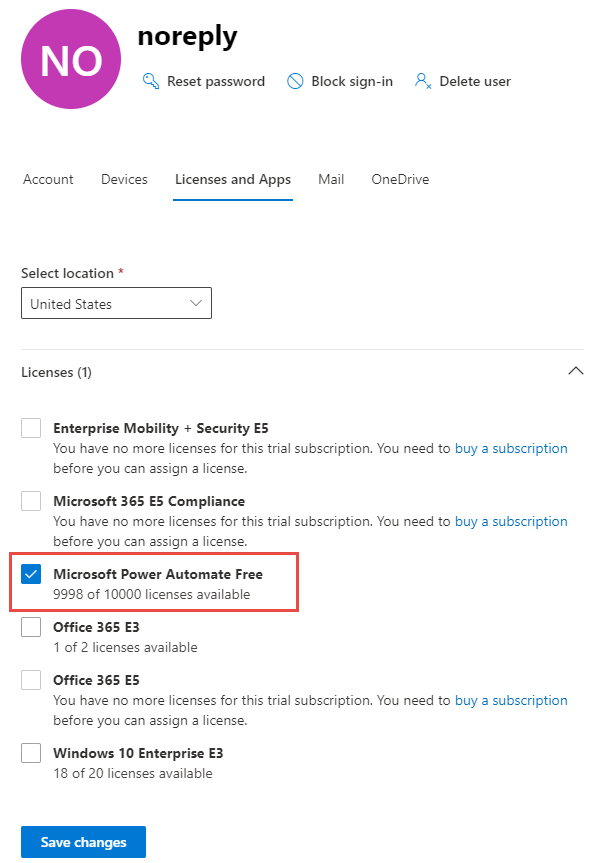
- From the same location, select the account tied to the shared mailbox and reset the password. Make note of this password for use in the next step.
- Using the credentials, you just set in step 2, sign into the shared mailbox at office.com.
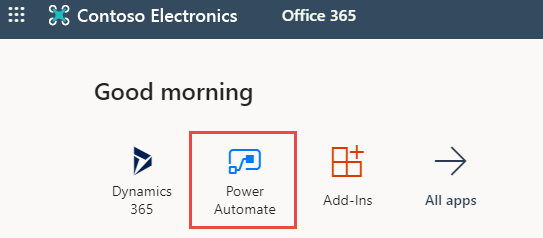
- Launch the Power Automate app from the Office 365 landing page.
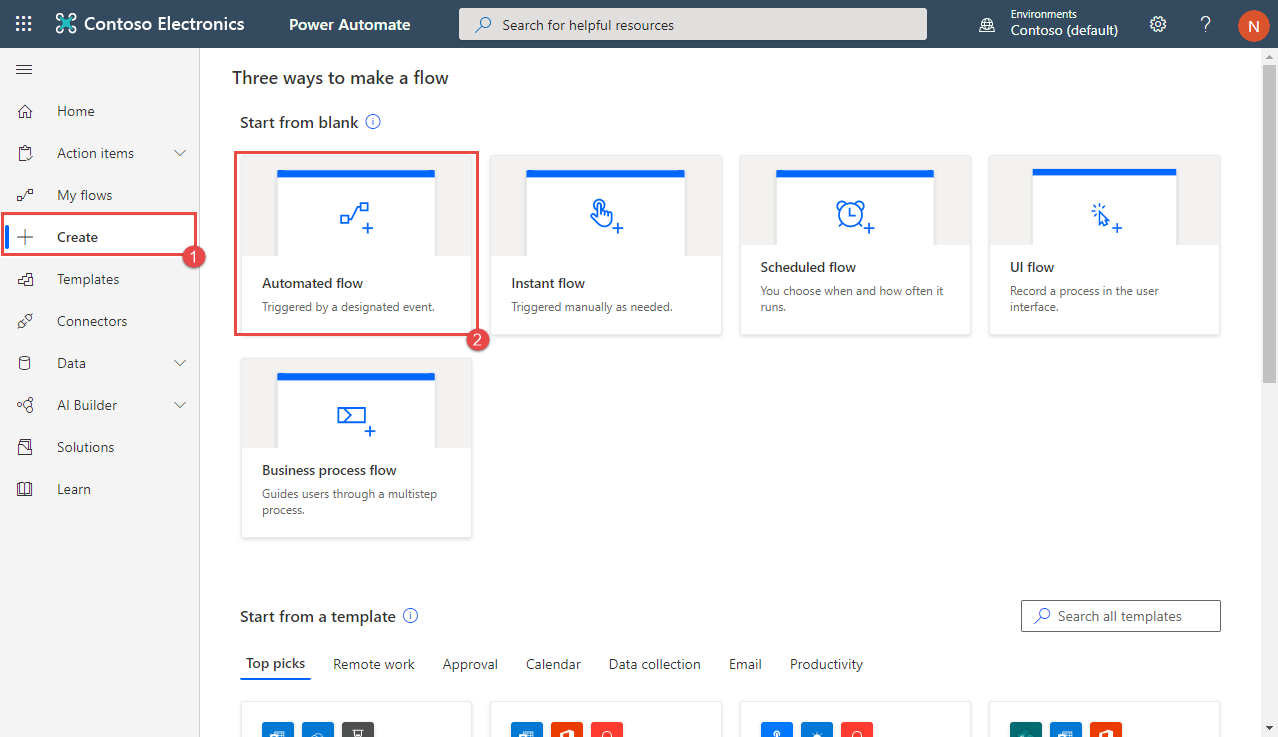
- From the Power Automate homepage, select Create on the left side bar (1) and then Automated flow from the center of the page (2).
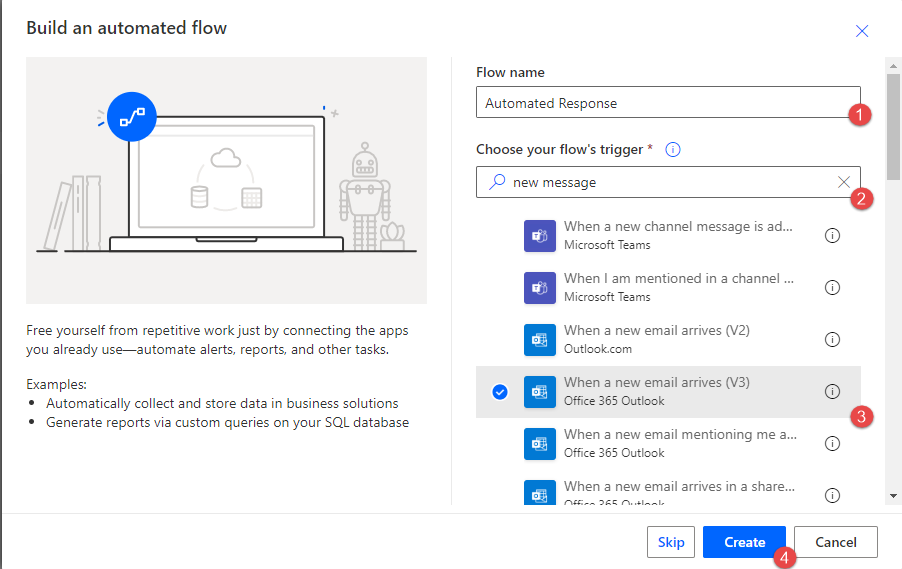
- In the new window, give your flow a name (1) and search for new message in the Triggers search field (2). Select the When an email arrives (v3) trigger (3). Click the Create button (4).
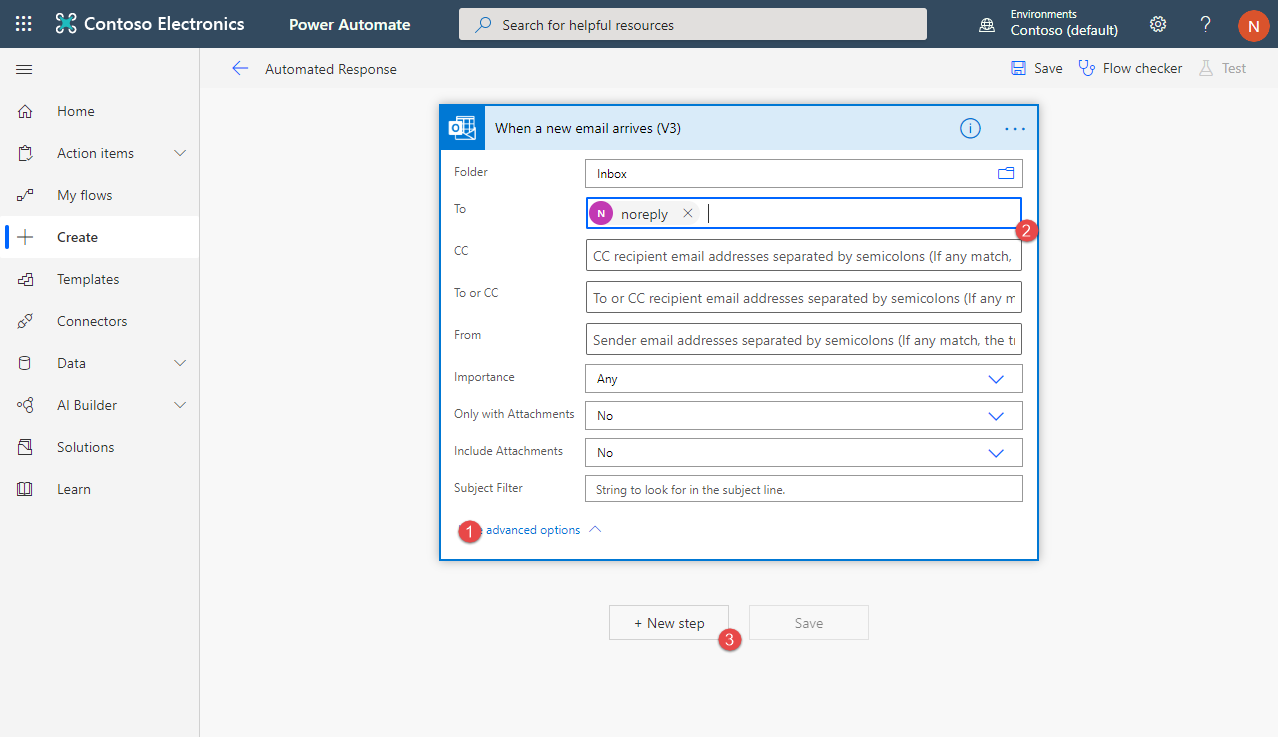
- Click advanced options (1), enter the address of the mailbox in the To: field (2), and then click the +New step button (3).
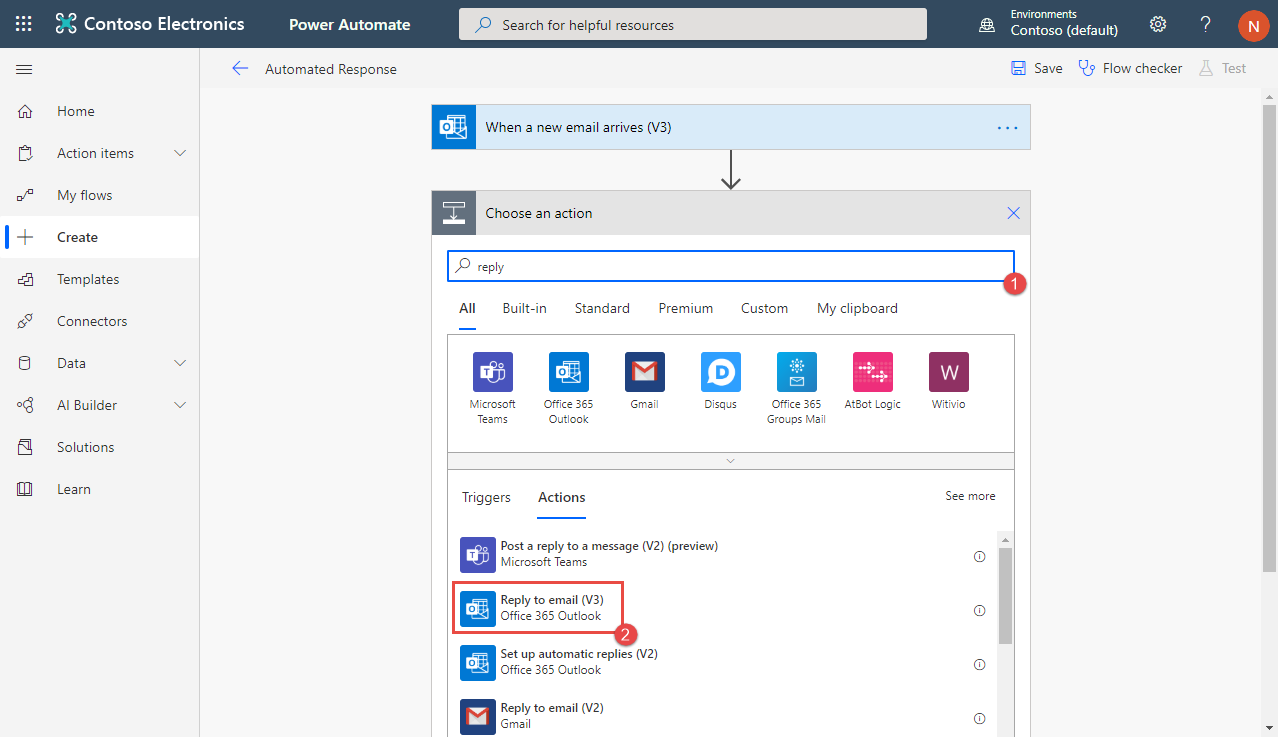
- Type reply in the search field (1) and select Reply to an email (v3) from the search results.
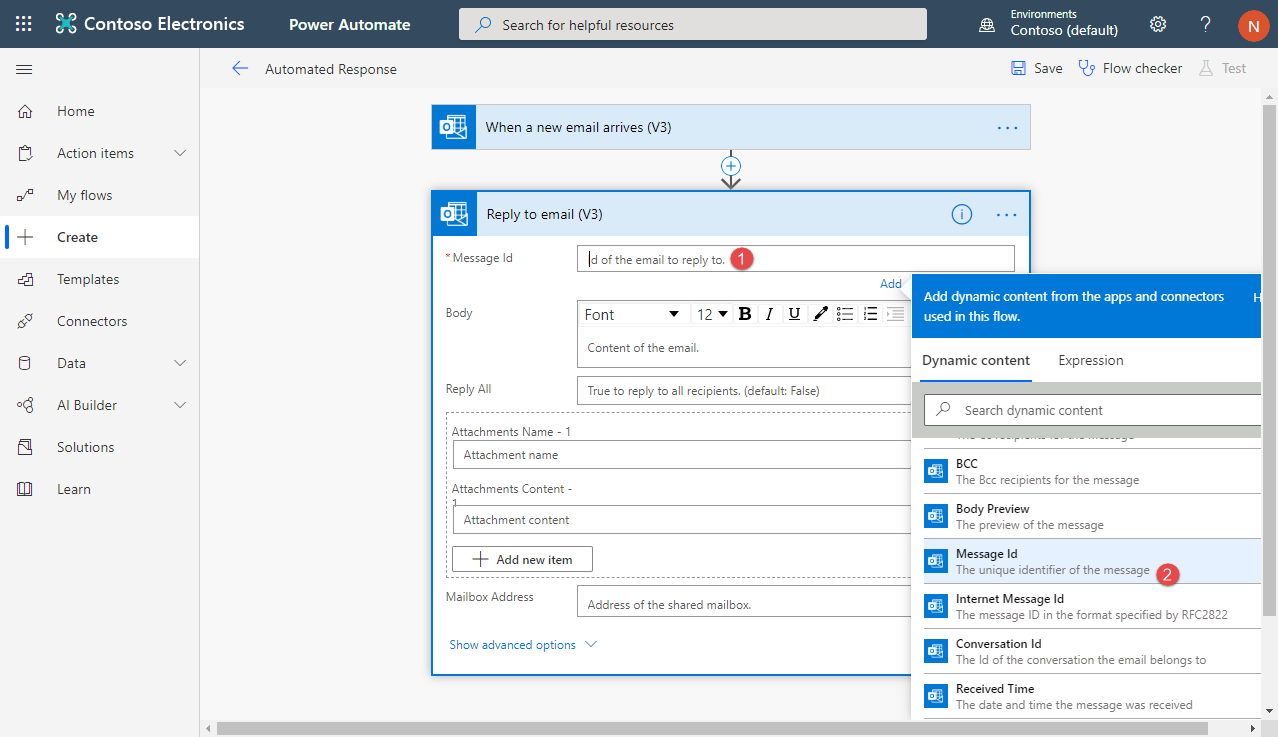
- Click in the Message Id field (1) and select Message Id from the Dynamic Content list (2).
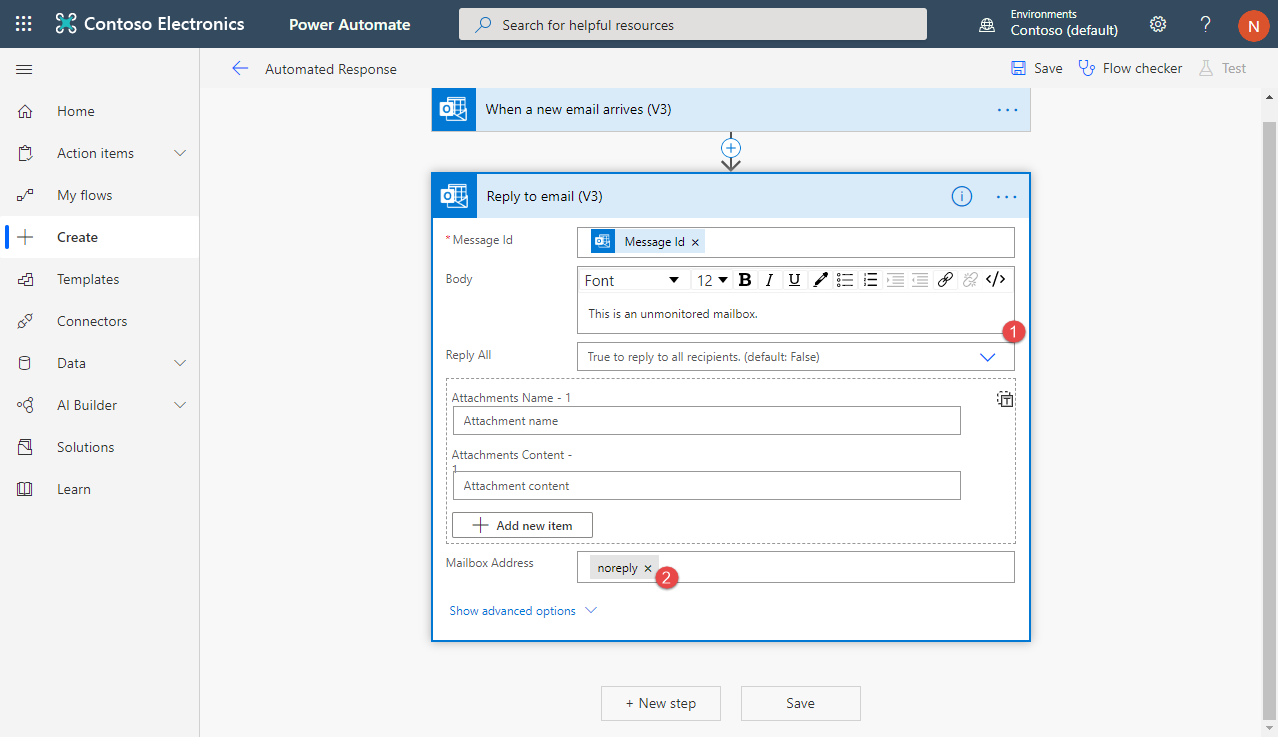
- Populate the Body field with what you want your automated reply message to be (1), and then enter the address of the shared mailbox in the Mailbox Address field (2).
- Click the Save button and you are all set! I recommend testing the flow by sending an email from both an internal and external address to the shared mailbox.
And that’s how easy Microsoft Power Automate makes setting up automatic responses from shared mailboxes. If you have any questions about this configuration or anything else regarding Microsoft Power Automate, please contact us at any time.
This publication contains general information only and Sikich is not, by means of this publication, rendering accounting, business, financial, investment, legal, tax, or any other professional advice or services. This publication is not a substitute for such professional advice or services, nor should you use it as a basis for any decision, action or omission that may affect you or your business. Before making any decision, taking any action or omitting an action that may affect you or your business, you should consult a qualified professional advisor. In addition, this publication may contain certain content generated by an artificial intelligence (AI) language model. You acknowledge that Sikich shall not be responsible for any loss sustained by you or any person who relies on this publication.


