


Managing approvals can be a tedious and often frustrating process for businesses. When employees take time off, the transactions they typically approve can often hold up the approval process until they return, leaving managers scrambling when it comes time for deadlines. Luckily, NetSuite can make that process far less cumbersome by incorporating Delegate Approvers into your approval process. This allows companies to assign a Delegate Approver to each employee. When they are unable to approve bills, simply fill in the Delegate Approver field with whoever should be taking over in their absence, and NetSuite will automatically reroute these approvals to them.
How to Use NetSuite Delegate Approvers
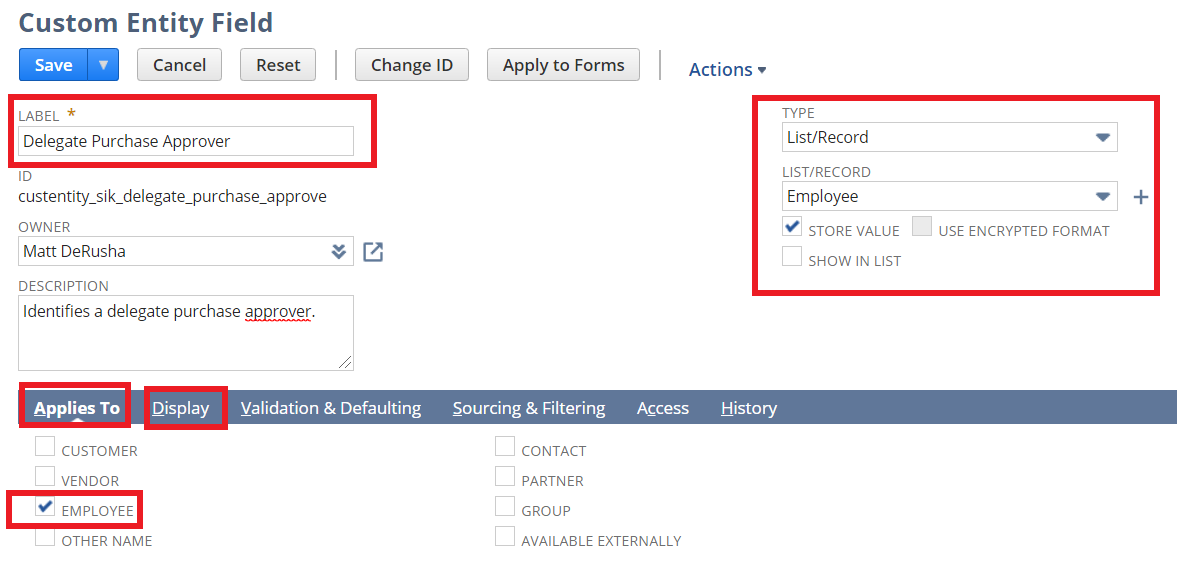
Create a Custom Entity Field for the Employee Form.
- Navigate to Customization > Lists, Records, & Fields > Entity Fields > New
- Label = Delegate Purchase Approver
- Type = List/Record
- List/Record = Employee
- Store Value = True
- Show in List = False
- Applies To = Employee
- Display > Subtab = Approvals
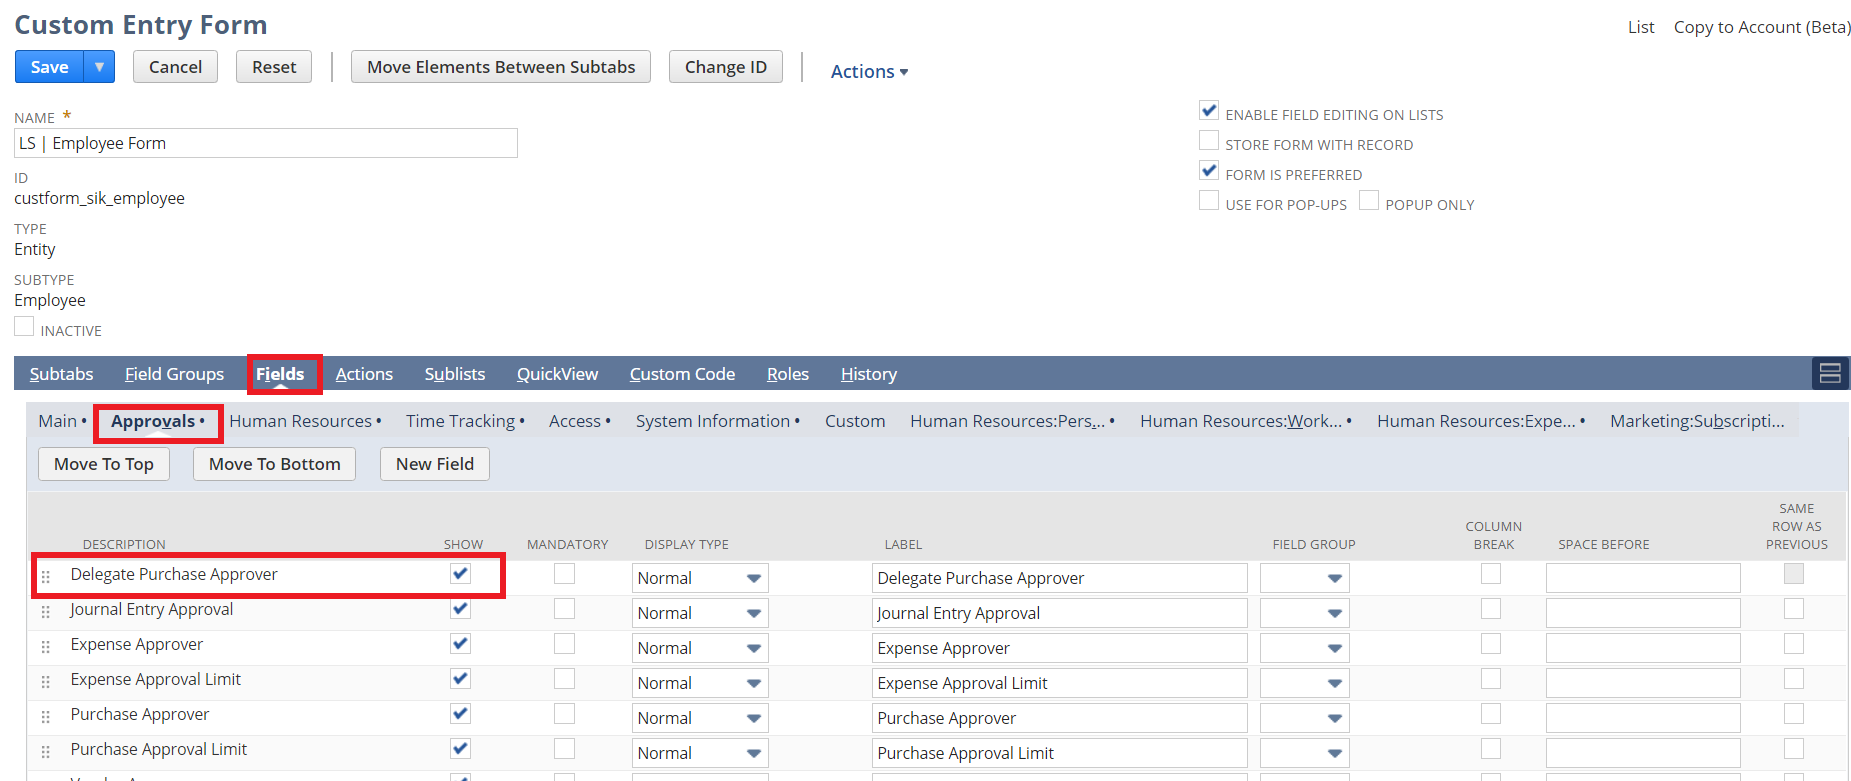
Customize the Employee Form to display the field.
- Navigate to Customization > Forms > Entry forms.
- Either select your current form or choose customize next to the standard NetSuite employee form.
- Navigate to the “Fields” tab at the bottom of the page and find the new field you created under the “Approvals” subtab. Click the checkbox labeled “Show.”
- Save the form.
Edit your approval workflows to incorporate delegate approval logic.
- Navigate to Customization > Workflow > Workflows and click edit on the workflow responsible for your approval processes (ex: AP Approval Workflow).
- Identify all “Set Field Value” actions in every state where the “Next Approver” is being set.
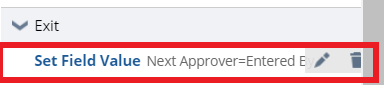
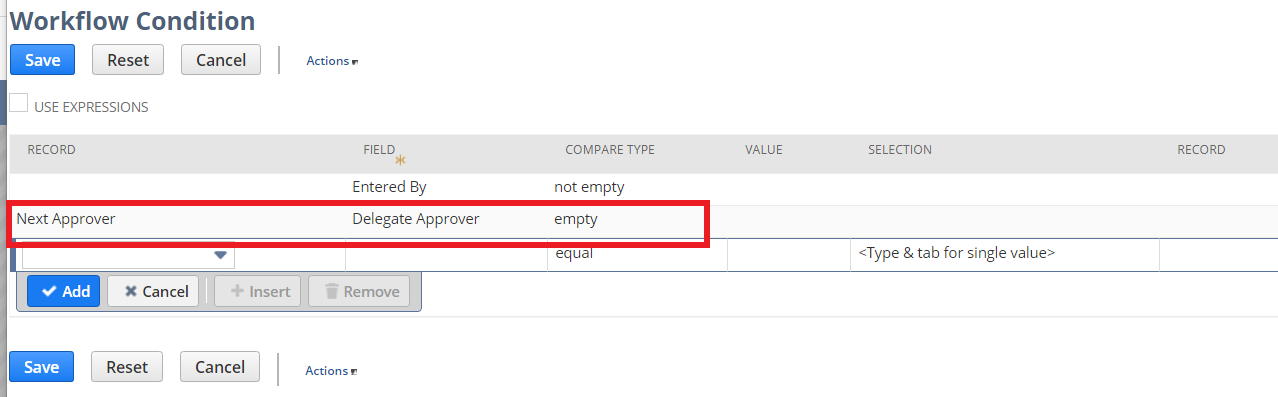
- Click on the “Set Field Value” hyperlink to edit this action. Edit the “Condition” on the action, and add the following:
- Record = Next Approver
- Field = Delegate Approver (created in Part 1)
- Compare Type = Empty
- Click add and save the condition (do not remove any existing conditions on this state).
- Create a new “Set Field Value” action for every instance from Steps 1-3.
- Under Parameters, select “Next Approver”
- Under Value, select “From Field.” Record = Next Approver and Field = Delegate Approver
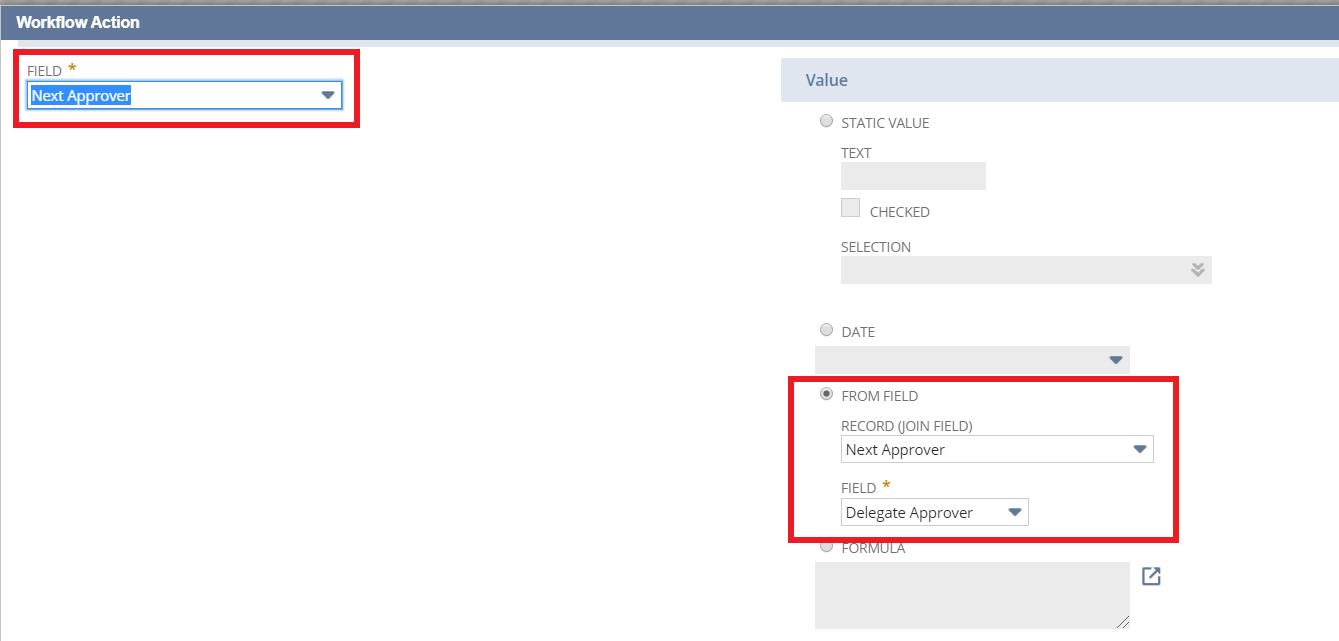
- Add a new condition. Record = Next Approver. Field = Delegate Approver. Compare Type = Not Empty

- Click add and save the condition, then save the workflow action.
Important to Note
You will not want to pre-populate the “Delegate Approver” values in Netsuite, but rather only fill this in when you would like NetSuite to reroute these approvals. When this value is filled on the employee record, it indicates to NetSuite to follow the delegate approval process rather than the standard logic.
If you’d like to learn more about NetSuite or if you think you would benefit from other tips to streamline internal processes such as this, please contact us at any time! You can also learn about more great tips for NetSuite on our YouTube playlist or our other blog posts.
This publication contains general information only and Sikich is not, by means of this publication, rendering accounting, business, financial, investment, legal, tax, or any other professional advice or services. This publication is not a substitute for such professional advice or services, nor should you use it as a basis for any decision, action or omission that may affect you or your business. Before making any decision, taking any action or omitting an action that may affect you or your business, you should consult a qualified professional advisor. In addition, this publication may contain certain content generated by an artificial intelligence (AI) language model. You acknowledge that Sikich shall not be responsible for any loss sustained by you or any person who relies on this publication.