


There are many different areas that require setup within Dynamics 365 Finance and Operations to achieve the often-desired email notification functionality from workflow. In this document, I will detail how I have seen it setup and some tips and tricks along the way to help create a fuller understanding of the D365 email functionality. I will break up the setup into four main areas: Workflow Configuration, Email settings, Batch jobs, and User Setup. For this example, I will use the Purchase order workflow.
Email Settings
Email Templates
One of the most important setups required for workflow notification emails to be properly sent via the system is the email templates. These can be found in two places within Dynamics 365: the System administration module and the Organization administration module.
The module the template is set up in will depend on the association of the workflow that is being configured. If the workflow is associated to a specific legal entity within the company’s D365 framework, then this will need to be configured in the System email templates form. If the workflow is associated with an organization-wide hierarchy, then it will use the System email templates form. To check which template the workflow in question will use, you can navigate to the workflow and look under the Association column.
In my example below, the “Purchase requisition by Manager” workflow uses the System email template and the “Purchase order workflow” uses the Organization email template.

Setting up Email Templates
The actual setup of the templates is quite simple, and I have outlined how each field correlates in the setup below.
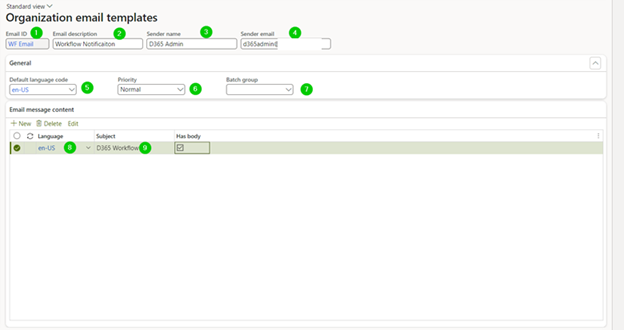
- This should be a unique value that is easily identifiable. This will be the value you select within the workflow configuration itself later in this document.
- This is not a mandatory field but can help to offer some clarification on what the template is used for. For instance, you might have different templates for various departments or workflows.
- This will be the name of the sender as it appears in your inbox once you receive the alert.
- This is the email address the notification should come from. Typically, there is a general admin email address that can be used.
- The language of the email.
- The priority of the email as it appears in your inbox.
- If you use different batch groups, specify which one to use here.
- The language of the actual emails content.
- The subject of the email as it appears in your inbox. You can use the %subject% placeholder here to use the “Work item subject” in the Assignment step of the workflow as the Subject line of the email.
HTML body
The final step of this template setup is to create some basic HTML code. Here is an example of a very basic one I used.
The %message% placeholder can be used in the HTML code to send the Workflow configuration’s “Work item instructions” in the body of the email.
An example of HTML code that can be used for an example is as follows:
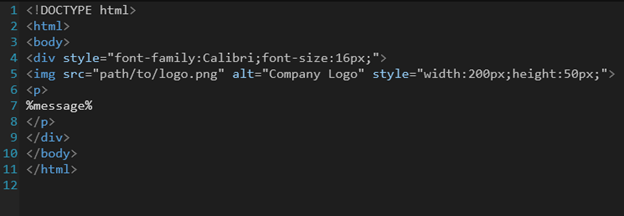
<!DOCTYPE html><html><body><div style="font-family:Calibri;font-size:16px;"><img src="path/to/logo.png" alt="Company Logo" style="width:200px;height:50px;"><p>%message%</p></div></body></html>
To add the HTML code to your email template, click the button labelled “Email Message” at the top of the form. This will open the following dialog where you can add your saved code via the “Browse” button.
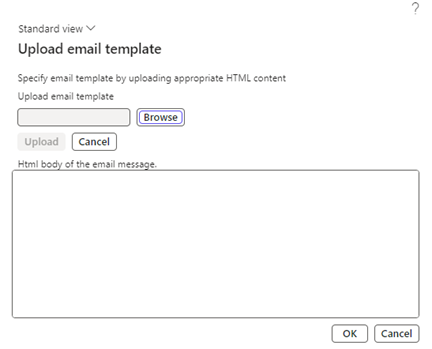
Once added you should see a preview of your code output in the window. Once you are happy with the results, click the OK button to complete the upload of the body of your emails.
Email Parameters
Finally, there will be some basic configuration required within the System administration > Setup > Email > Email parameters form. In this example, I am using SMTP as the basis of the email server. I have outlined the setup used in the general tab of the Email parameters form.
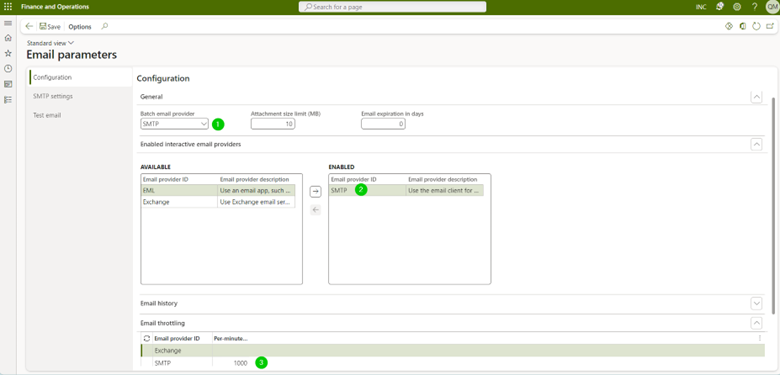
- I am using an SMTP email server, so that is what is selected here.
- Make sure to enable the correct email provider that is being used.
- Add some general throttling guidelines to the email provider ID. This will be the maximum number of emails this provider can send per minute.
Workflow Configuration
There are multiple layers of setup required to successfully implement Dynamics 365 workflow email notifications. The first layer is the overall parameters of the workflow. The second layer is the parameters set at the approval elements within the workflow. The third and final layer is the parameters set at the assignment level within the approval elements of the workflow.
1. Overall Parameters of the Workflow
To navigate to the overall parameters of the workflow, simply click on the outside edge of the workflow space, or in an empty space of the workflow, and click Properties. You should see something like this:
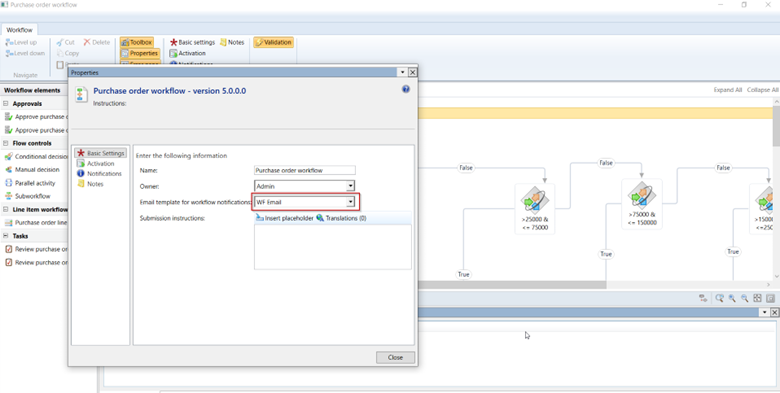
Here, you need to assign the email template that is to be used for workflow notifications. In my purchase order example, I chose “WF Email,” which we set up below in Email settings as an email template. Additionally, you can specify instructions for end users to see when they are submitting a workflow in the box below. This would be seen here:

2. Approval Elements of the Workflow
Next, you will need to set up the notifications at the Approval steps within the workflow. Click on the approval step and click Properties. Alerts can be configured for the different events that can happen from an approval step in a workflow. This could be an “Accept,” “Reject,” “Escalate,” “Delegate,” or “Request Change.” In the example below, I show the setup required to send a notification back to the workflow originator, telling them their Purchase Order has been approved.
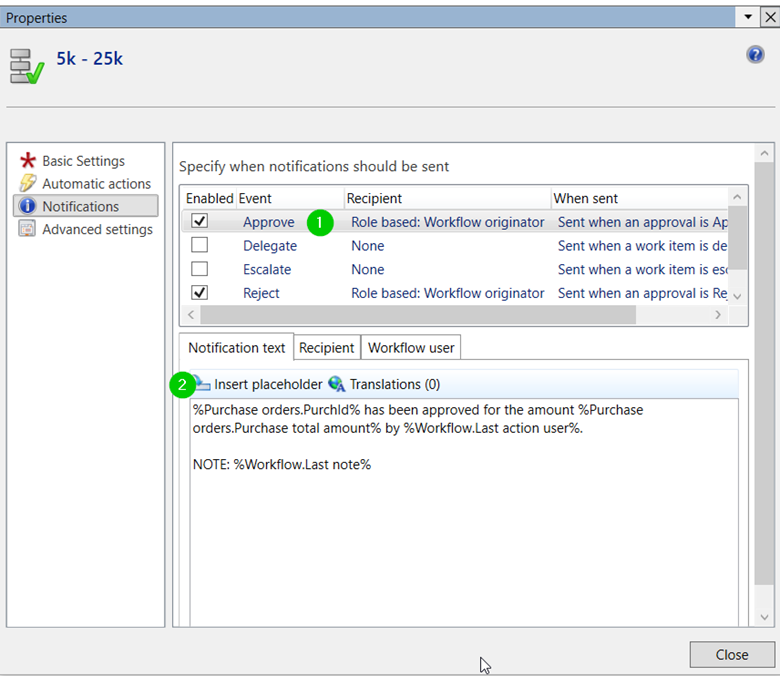
- The event in the upper half of the screen specifies what will trigger the text below to be sent via email.
- The text below is what the email notification will contain for the specified event. Thus, you can have slightly different emails sent for each type of event. (i.e. one saying it has been approved, another saying it has been rejected).
- One of the best things about this text area is the ability to use placeholders to call certain fields from that purchase order or workflow instance. One common requirement from clients is to be able to send customized comments back through email.
- To pull in the comments associated with an accepted or rejected workflow instance, I utilized the %Workflow.Last note%
- Also, be sure to set a value in the Recipient tab. In this example, I selected “Workflow user,” which is why the third tab, Workflow user, appears.
- In the Workflow User tab, I then selected Workflow originator. This ensures that the person who initially submitted the purchase order will receive a notification that the purchase order has been approved.
3. Assignment Step Within the Approval Elements
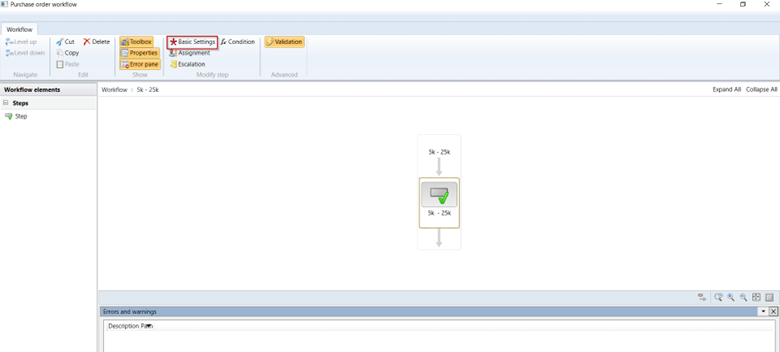
Finally, most companies require a notification to be sent when there is a pending workflow instance to review for a designated approver. To set up notification alerts for this, you must go into the approval step’s assignment section. To navigate to this, double-click on the approval step. Then click on the inner box inside the approval step. With the approval step highlighted, click “Basic Settings” in the action pane.
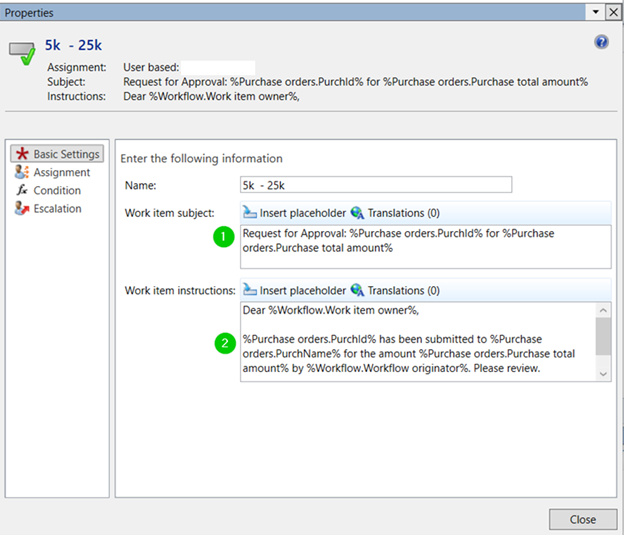
In the Basic Settings of the assignment step, you can specify a specific subject line and email message to be sent to the person who needs to approve the purchase order. In my example below, you can see I used placeholders to create a customized subject (1) and body (2) of the email.
Batch Jobs
In addition to the email setup, there are also some batch jobs that must be configured in Dynamics 365 and running for the system to process and send these workflow email notifications and alerts. Below I have outlined the different batch jobs and the role they play for this overall functionality.
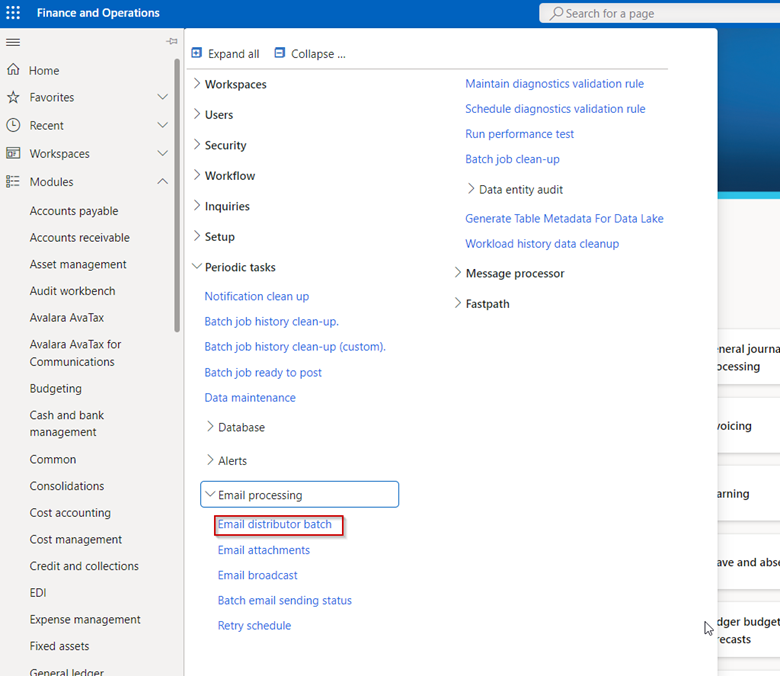
Email distributor batch
Navigate to System administration > Periodic tasks > Email processing > Email distributor batch. This enables the system to send out the emails at the time intervals set in the recurrence.
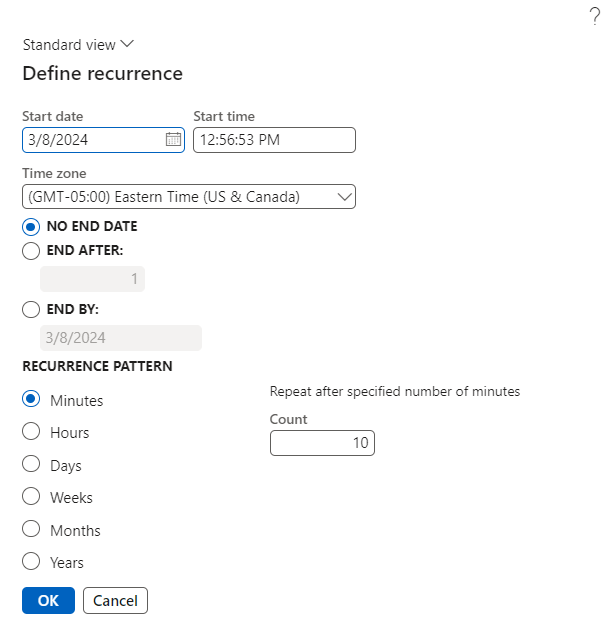
Next, Click Recurrence and set the time interval that you would like these emails to be sent out at. In the example below, the new emails are set to be sent out every minutes.
The four workflow specific batch jobs are all running in this example every 1-2 minutes. However, I want to document them here so they can at least serve as a checklist of other batch jobs to make sure you have running in the background:
- Workflow message processing
- Workflow line-item notifications
- Workflow due date processing
- Workflow Maintenance
User Setup
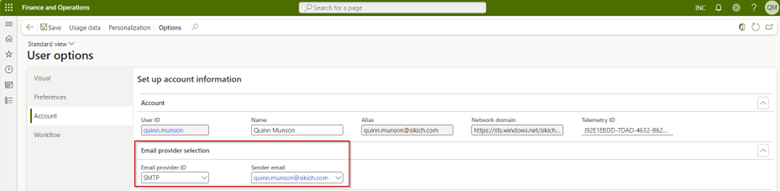
Finally, you are ready to enable the notifications at the end user level. This can be done for an individual user by simply slicking in the top right corner on the gear icon of your screen and selecting User options.

Next, ensure your Account options are set up correctly with the Email provider ID and the sender email.
Finally, ensure under the Workflow tab that you have the “Send notifications in email” slider toggled to Yes.

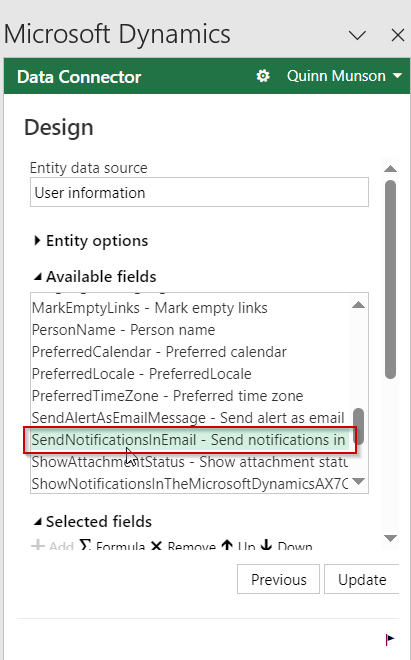
Alternatively, this can also be done by system administrators using the excel add-in User information from the Users form.

Once you have the add-in opened, use the designer to add the required fields to the columns in the workbook so that you can quickly toggle the slider to yes or insert an email for a user.
Have any questions about how to set up workflow email notifications in Dynamics 365 for Finance and Operations? Please reach out to one of our experts at any time!
This publication contains general information only and Sikich is not, by means of this publication, rendering accounting, business, financial, investment, legal, tax, or any other professional advice or services. This publication is not a substitute for such professional advice or services, nor should you use it as a basis for any decision, action or omission that may affect you or your business. Before making any decision, taking any action or omitting an action that may affect you or your business, you should consult a qualified professional advisor. In addition, this publication may contain certain content generated by an artificial intelligence (AI) language model. You acknowledge that Sikich shall not be responsible for any loss sustained by you or any person who relies on this publication.