Using Live Migration to Move Virtual Machines to a New Host
John Branch
|
Feb 8 2019
|
6 min read
Moving a Virtual Machine (VM) from one stand-alone Microsoft Hyper-V host server to another is a common practice. It is most often associated with an upgrade cycle where the old Hyper-V server is being replaced with new hardware and an updated Operating System.
The Shared Nothing Live Migration feature is a powerful tool to complete this task. This feature is also referred to as Live Migration without Failover Clustering in Windows Server 2016. It allows an administrator to move a running VM from the old server automatically and with minimum impact to the environment. This capability was introduced in Windows Server 2012 and it provides interoperability with the later Operating Systems. This Cross-Version Migration capability enables the movement of hosted VMs from an older server, such as a Windows Server 2012 R2 host, to a newer Operating System like Windows Server 2016 or later.
The process relies on the same technology used with Hyper-V Replica to replicate the files that compose the VM (VHDX, config, memory contents, etc.) to the new server and then automate a cut-over from the old host to the new one once the transfer is complete. The replication process includes the memory contents of the running VM. Once the transfer is complete the VM commences to run on the new host with a nearly imperceptible interruption of service. This momentary transition can be observed as a single missed ping reply during the transition. End-users and applications typically cannot notice any change or interruption.
There are a few requirements based on the versions of Hyper-V in play:
A user account with administrative privileges on both source and destination Hyper-V servers. This account will need to be a member of the Domain Administrators group if using constrained delegation
A minimum of VM version 5 to enable migrations from Windows Server 2012 R2 and Windows Server 2016
Supported Cross-Version Migrations:
Windows Server 2012
TO/FROM
Windows Server 2012
Windows Server 2012
TO
Windows Server 2012 R2
Windows Server 2012 R2
TO/FROM
Windows Server 2012 R2
Windows Server 2012 R2
TO
Windows Server 2016
Windows Server 2016
TO/FROM
Windows Server 2016
Source and destination Hyper-V servers must be members of the same Active Directory domain, or belong to domains that trust each other
Key Considerations
The authentication method for Live Migration determines which protocol will be used to authenticate the live migration traffic. The use of Kerberos requires additional configuration of Constrained Delegation in Active Directory. This may be useful in cases where you want to enable the ability to move VM’s between hosts for an undetermined period as part of normal operations. For a simple one-time migration related to a Hyper-V host upgrade you may want to consider using the simpler Credential Security Support Provider (CredSSP) method. One limitation of the CredSSP method is that it requires that you are actively logged on to the source server.
The performance of the Hyper-V servers may be impacted by the migration process. There are options to reduce not only the load on the server, but also the time required to transfer the contents of the VM’s running memory. In most simple use cases the Compression option in conjunction with a TCP/IP connection will provide acceptable performance during the migration.
You can also manually specify which network connection the migration will use. This could be beneficial if the source and destination servers have multiple network connections so that the highest speed connection can be used, and/or the migration occurs on a network segregated from normal production network traffic.
Configuration
To configure Live Migration using CredSSP:
Open Hyper-V Manager. (From Server Manager, click Tools>>Hyper-V Manager.)
In the navigation pane, select one of the servers. (If it isn’t listed, right-click Hyper-V Manager, click Connect to Server, type the server name, and click OK. Repeat to add more servers.)
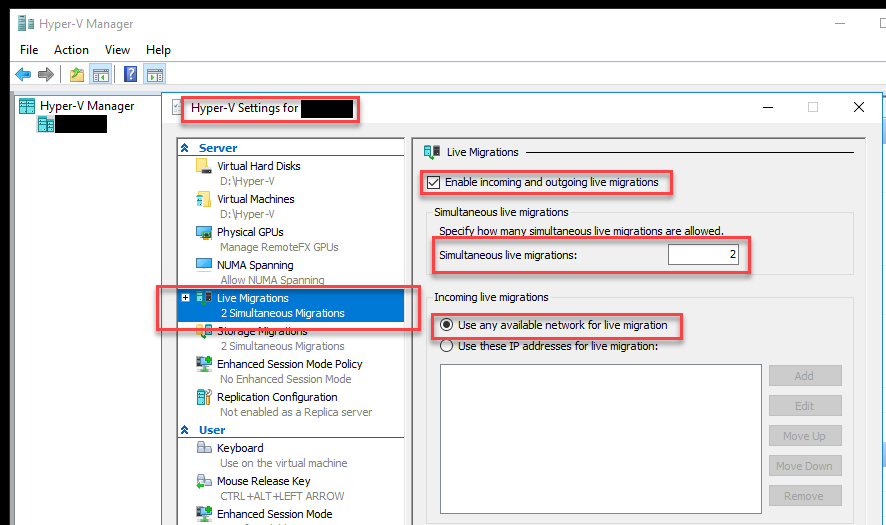
In the Actionpane, click Hyper-V Settings >>Live Migrations.
In the Live Migrationspane, check Enable incoming and outgoing live migrations.
Under Simultaneous live migrations, specify a different number if you don’t want to use the default of 2.
Under Incoming live migrations, if you want to use specific network connections to accept live migration traffic, click Addto type the IP address information. Otherwise, click Use any available network for live migration. Click OK.
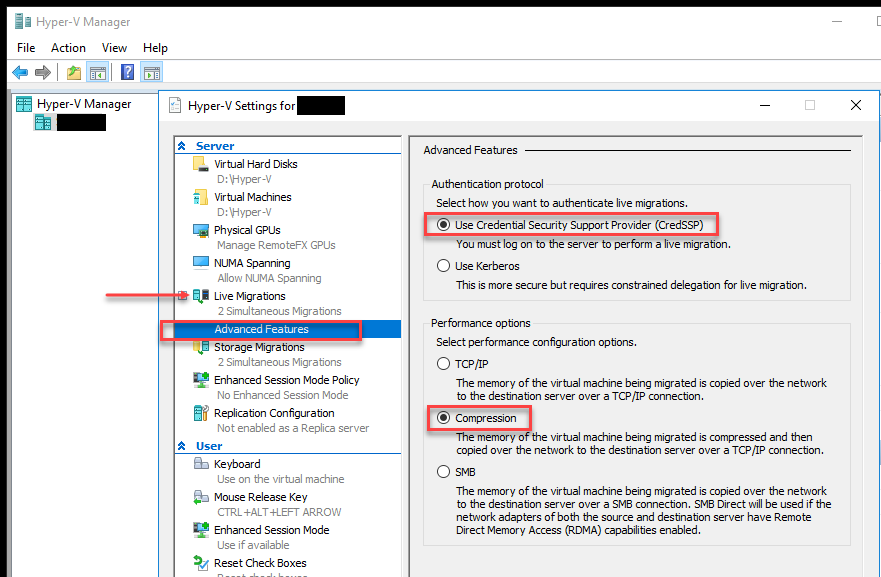
To choose CredSSP and performance options, expand Live Migrationsand then select Advanced Features.
In this example we are configuring an intended one-time use to complete a migration of a VM as part of a host upgrade, under Authentication protocol, select CredSSP.
Under Performance options, select Compression to enable compression of the VM’s memory before using TCP/IP to transfer the running contents.
Click OK.
Select the other server in Hyper-V Manager and repeat the steps.
PowerShell can also be used to perform or script the migration. The available commands include Enable-VMMigration, Set-VMMigrationNetwork, and Set-VMHost. The following commands would be used to complete the configuration above:
Note: The default configuration includes 2 simultaneous live migrations, use any available network for live migration, and Compression.
Virtual Machine Live Migration
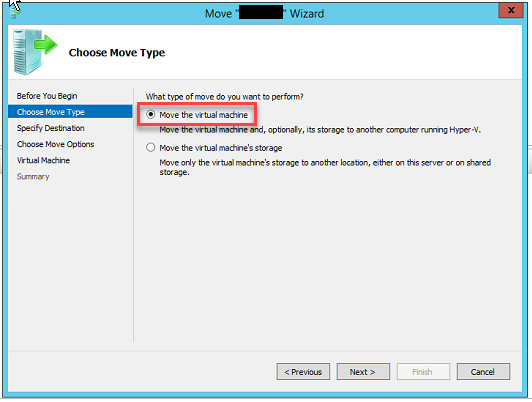
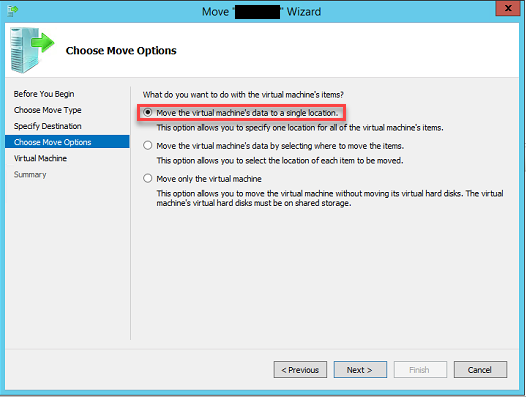
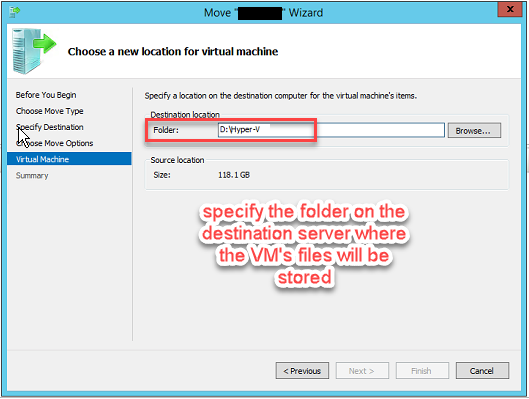
The process to migrate, or move, a VM to the destination server is very simple. Using the CredSSP authentication option, you will need to be logged on to the source server. Using Hyper-V Manager, the move is completed using a wizard that will ask you what type of move you will be performing. You can move either the entire VM including its disk files or move the storage associated with a specific VM to a new storage location.
Open Hyper-V Manager. (From Server Manager, click Tools>>Hyper-V Manager.)
In the navigation pane, select one of the servers. (If it isn’t listed, right-click Hyper-V Manager, click Connect to Server, type the server name, and click OK. Repeat to add more servers.)
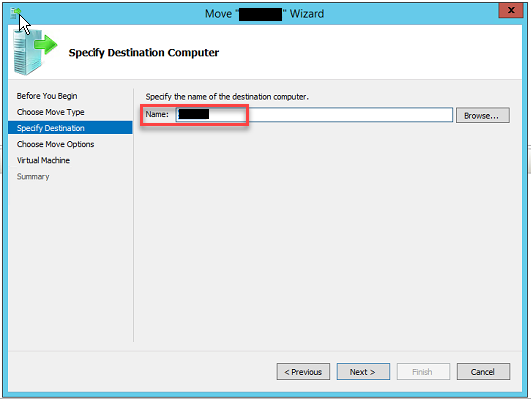
From the Virtual Machines pane, right-click the virtual machine and then click Move. This opens the Move Wizard.
Use the wizard pages to choose the type of move, destination server, and options.
On the Summary page, review your choices and then click Finish.
The progress of the move can be monitored in Hyper-V Manager. The time required will be dependent on factors including the size of the VM’s hard disk and memory files and the speed of the network connecting the source and destination servers. You may be prompted to connect the VM to a Virtual Switch if the names differ between the source and destination servers. The VM will be removed from the source server and will appear in the Virtual Machines pane of Hyper-V Manager on the destination server once the migration completes.
The Move-VM PowerShell command can also be used to move the VM. The following command mimics the example above:
Have issues with your infrastructure? We have a team full of IT experts ready to help. Let’s talk!
This publication contains general information only and Sikich is not, by means of this publication, rendering accounting, business, financial, investment, legal, tax, or any other professional advice or services. This publication is not a substitute for such professional advice or services, nor should you use it as a basis for any decision, action or omission that may affect you or your business. Before making any decision, taking any action or omitting an action that may affect you or your business, you should consult a qualified professional advisor. In addition, this publication may contain certain content generated by an artificial intelligence (AI) language model. You acknowledge that Sikich shall not be responsible for any loss sustained by you or any person who relies on this publication.
About the Author
John Branch
John has over 30 years of experience working with technology. His career began in the US Navy where he contributed to several communities including Naval Aviation, Naval Special Warfare, and Naval Cryptography. Upon transitioning to the private sector, he delivered technical training on foundational networking technologies including switching and routing as a Certified Cisco Systems Instructor (CSSI). For over 15 years, John has been working as a network consultant assisting clients in achieving their business objectives through technology and trusted advice. John’s operational expertise includes complex network design and implementation (routing, switching, wireless, and security) with Cisco, Meraki, Juniper, and HPE Aruba networking equipment. John has considerable experience with server virtualization using Microsoft Hyper-V and Azure. He also has actively worked in cybersecurity developing assessment and testing methodologies for his clients. He holds several certifications from industry leaders including Cisco, Microsoft, Citrix, and SonicWall.
Sign up for Insights
Join 14,000+ Business executives and decision makers.
Latest Insights
News Release
Sikich Recognized as NetSuite Winter 2025 Alliance Partner S...
April 2, 2025
News Release
Sikich Recognized as NetSuite Winter 2025 Alliance Partner S...
April 2, 2025
CHICAGO – April 2, 2025 – Sikich, a Chicago-based leading global technology-enabled professional services company, has been honored with the Wint...
A Guide to NetSuite’s Intercompany Automation Across Diffe...
April 2, 2025
NetSuite
A Guide to NetSuite’s Intercompany Automation Across Diffe...
April 2, 2025
Businesses face challenges when managing intercompany transactions across their subsidiaries, becoming increasingly difficult when multiple currencie...
Transaction Line Distribution SuiteApp: Automate Single-Tran...
March 31, 2025
NetSuite
Transaction Line Distribution SuiteApp: Automate Single-Tran...
March 31, 2025
Many businesses struggle with accurately distributing expenses across departments or subsidiaries. Manual cost allocation is inefficient, error-prone...
Empowering Federal Organizations with Oracle Cloud Solutions...
March 28, 2025
Oracle Cloud
Empowering Federal Organizations with Oracle Cloud Solutions...
March 28, 2025
Federal organizations operate in a complex environment characterized by resource constraints, stringent regulatory requirements, and the need for ope...
Drive Business Team Efficiency with Published Workspaces
March 27, 2025
Dynamics 365>Dynamics 365 Finance and Operations
Drive Business Team Efficiency with Published Workspaces
March 27, 2025
A core business team's crucial function is teamwork. A centralized dashboard helps teams leverage experience and insights to deliver business value. ...
Autopilot: Directly Uploading the Hardware Hash to Intune
March 26, 2025
Information Technology
Autopilot: Directly Uploading the Hardware Hash to Intune
March 26, 2025
For IT professionals managing Windows Autopilot, the process of adding devices has traditionally involved coordinating with your hardware vendor to h...
Regulatory Compliance in the Logistics Industry: Key Challen...
March 26, 2025
Security
Regulatory Compliance in the Logistics Industry: Key Challen...
March 26, 2025
The logistics industry is a complex and dynamic sector that plays a crucial role in the global economy. However, it also faces numerous regulatory ch...
Risks of Non-Compliance and Lack of Risk Management in Finan...
March 25, 2025
Technology
Risks of Non-Compliance and Lack of Risk Management in Finan...
March 25, 2025
In the financial services industry, compliance and risk management are paramount to maintaining trust and stability. Non-compliance can lead to sever...
Exploring the Sales Price List Experience in Business Centra...
March 24, 2025
Dynamics 365>Dynamics 365 Business Central
Exploring the Sales Price List Experience in Business Centra...
March 24, 2025
Microsoft Dynamics 365 Business Central continues to evolve, and with version 26, the Sales Price List experience has undergone significant changes. ...
This website uses cookies so that we can provide you with the best user experience possible. Cookie information is stored in your browser and performs functions such as recognising you when you return to our website and helping our team to understand which sections of the website you find most interesting and useful.
Strictly Necessary Cookies
Strictly Necessary Cookie should be enabled at all times so that we can save your preferences for cookie settings.
If you disable this cookie, we will not be able to save your preferences. This means that every time you visit this website you will need to enable or disable cookies again.